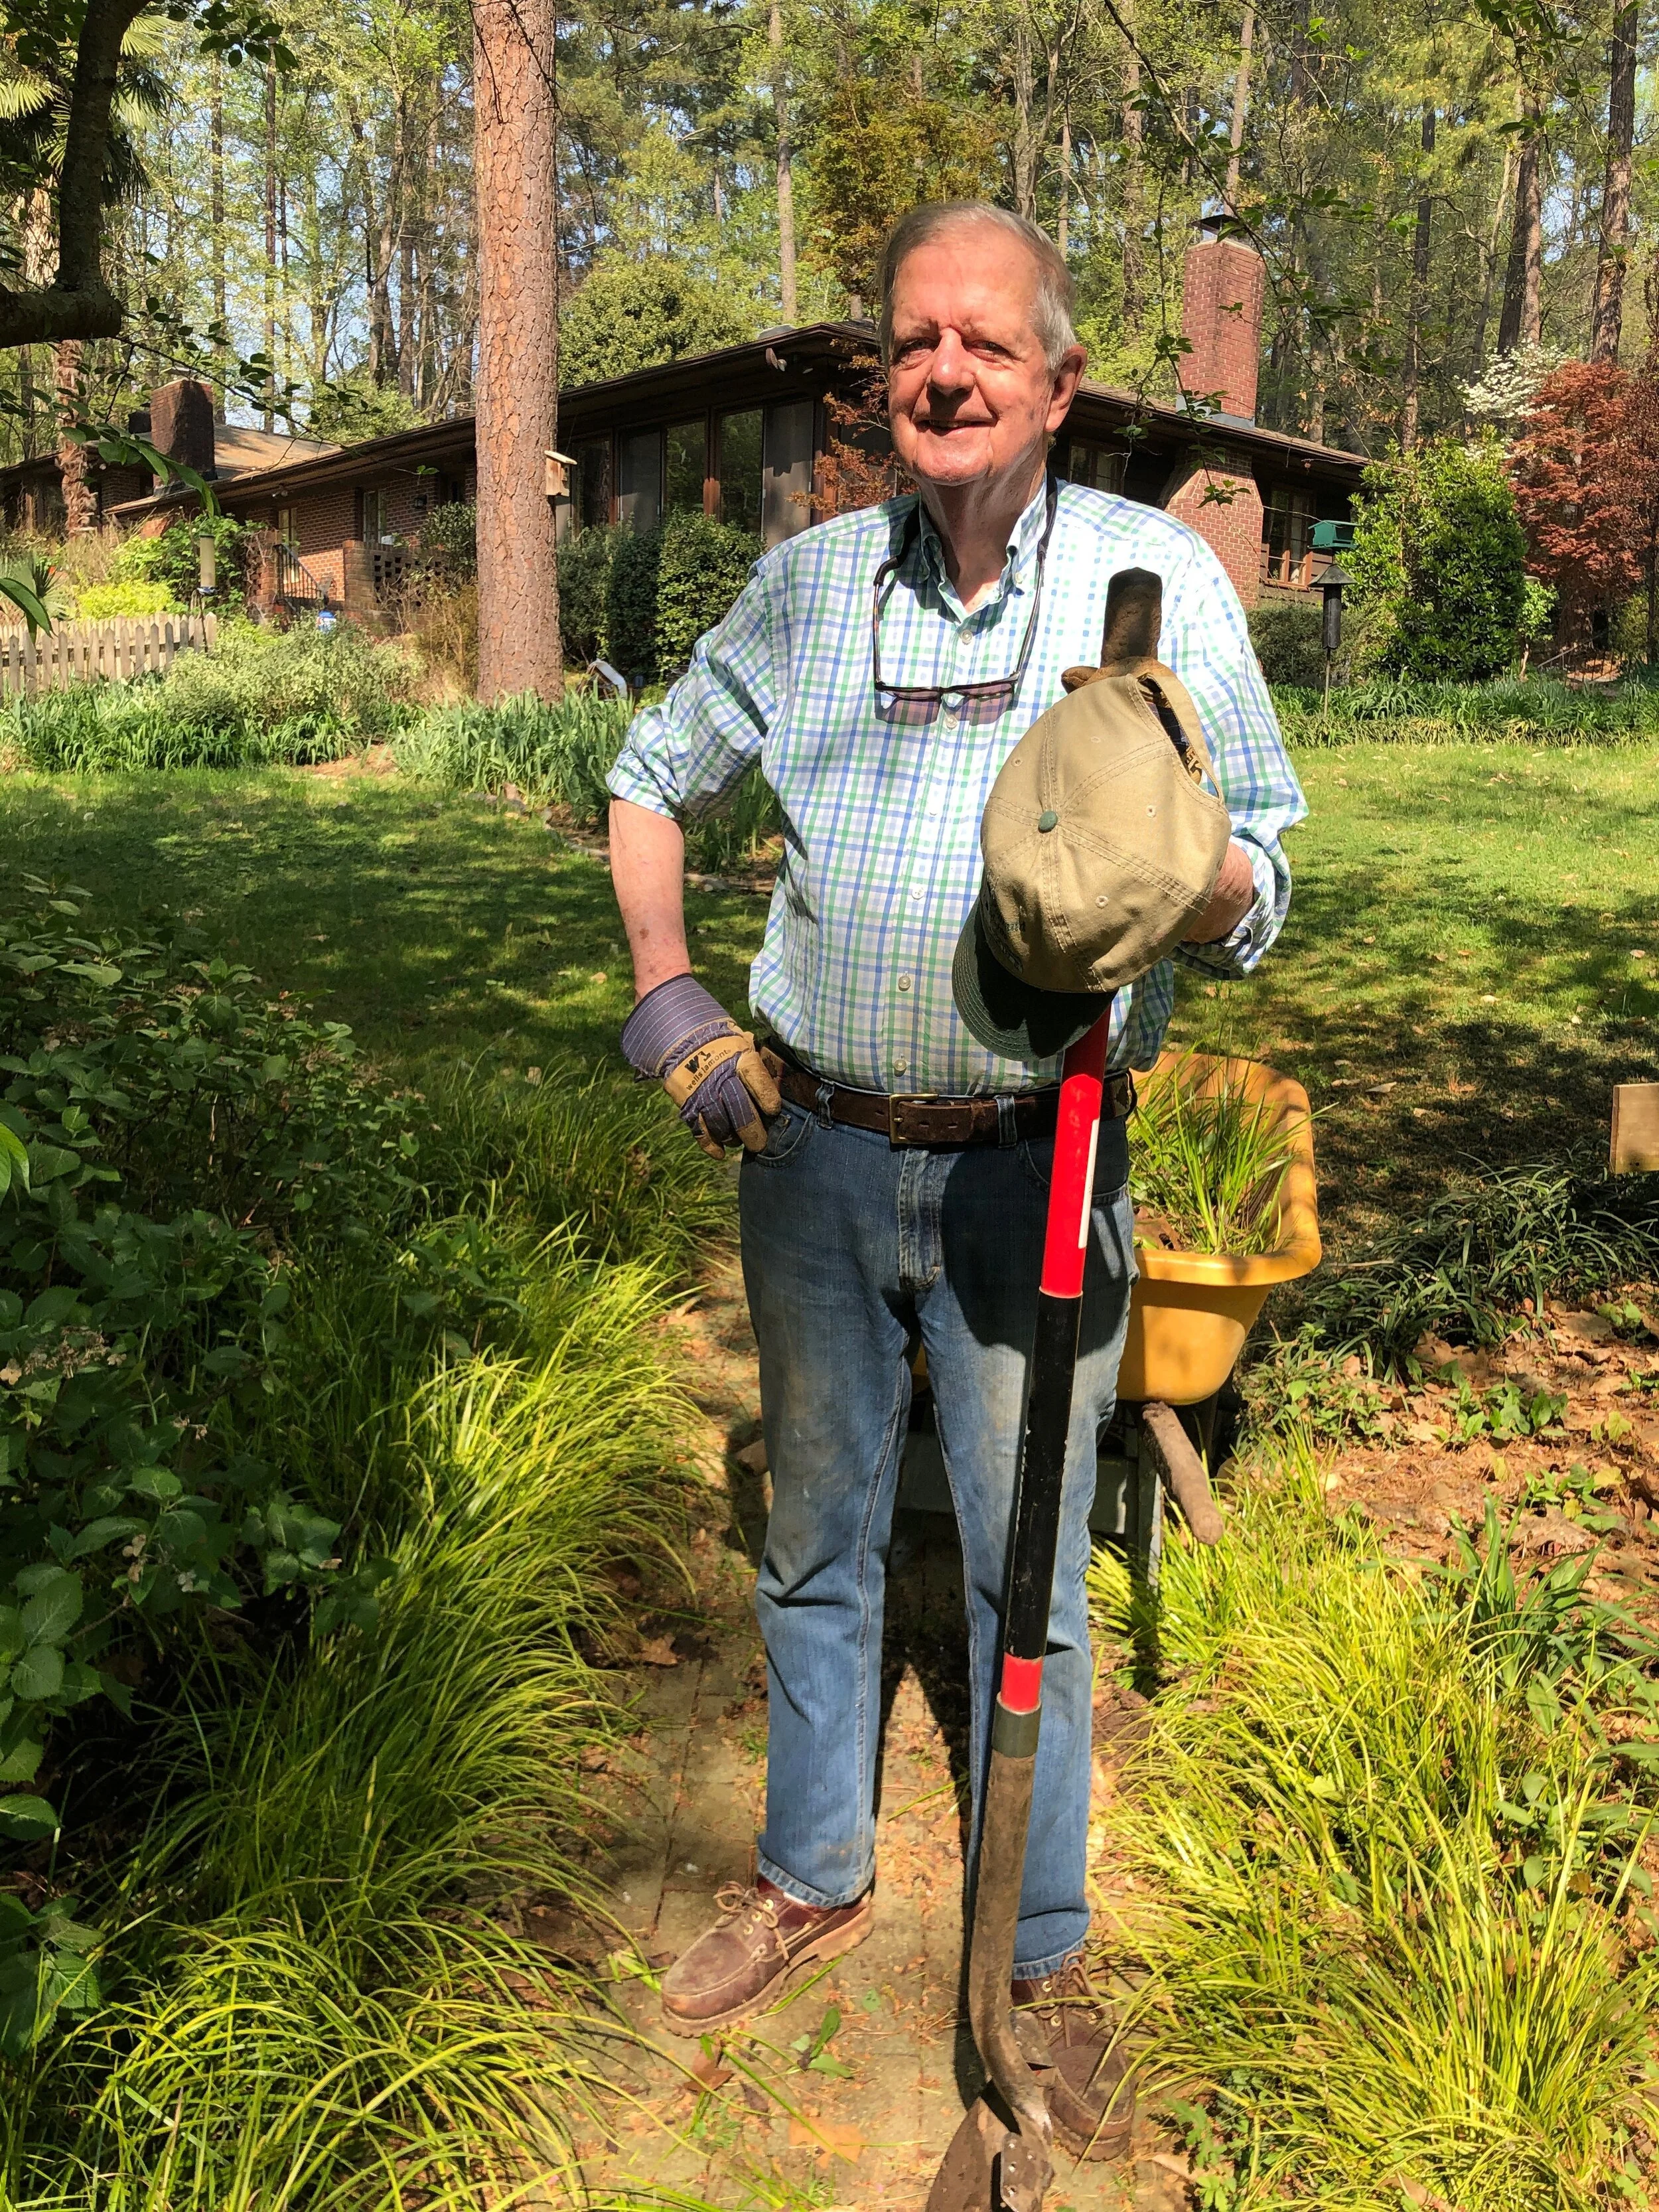
The Joslin Garden—Not Tonight, Deer—5-27-2021

Just when you think you are deer-free, one is spotted in the garden! Even if Nell Joslin didn’t actually see it to capture a pic, I would have known a deer visited since this particular deer went after our newly blossomed roses. There was the characteristic tearing at the top of the ripped stems.

A deer visiting The Joslin Garden

A deer visiting The Joslin Garden

Through conservation, we at The Joslin Garden spend a good bit of time caring for the wildlife within. But there is a real problem with unwelcome wildlife. For many of us, that means deer.

Certainly, there are many other pests that bother the residential gardener, such as moles, voles, rabbits, squirrels, opossums, and raccoons, but deer are some of the most common garden-wreckers in many regions.

Deer are becoming a problem even in suburbia; maybe that is better phrased “especially in suburbia.” Most of our suburban gardens were not planned to deal with deer. However, as our developments continue to take away animal habitats, deer look for food wherever they can—often in our own back yards.

Sprays are somewhat effective in defending against deer, but you have to reapply monthly and on any new growth. The best defense against deer is a good offense. Don’t plant the things deer love most—unfortunately, that includes garden favorites like roses and hostas. At first, you may think you are diluting your plant choices, and perhaps you are to a degree. But you are also giving yourself the opportunity to learn about and use plants you might not have otherwise considered.

Below is a list of plants deer are less likely to eat. I would be remiss not to say, “They will never eat these,” because if deer are hungry enough, they’ll eat anything. In general, though, if the plant has a rough texture or a bad taste, deer will avoid it. 

PERENNIAL FLOWERS:
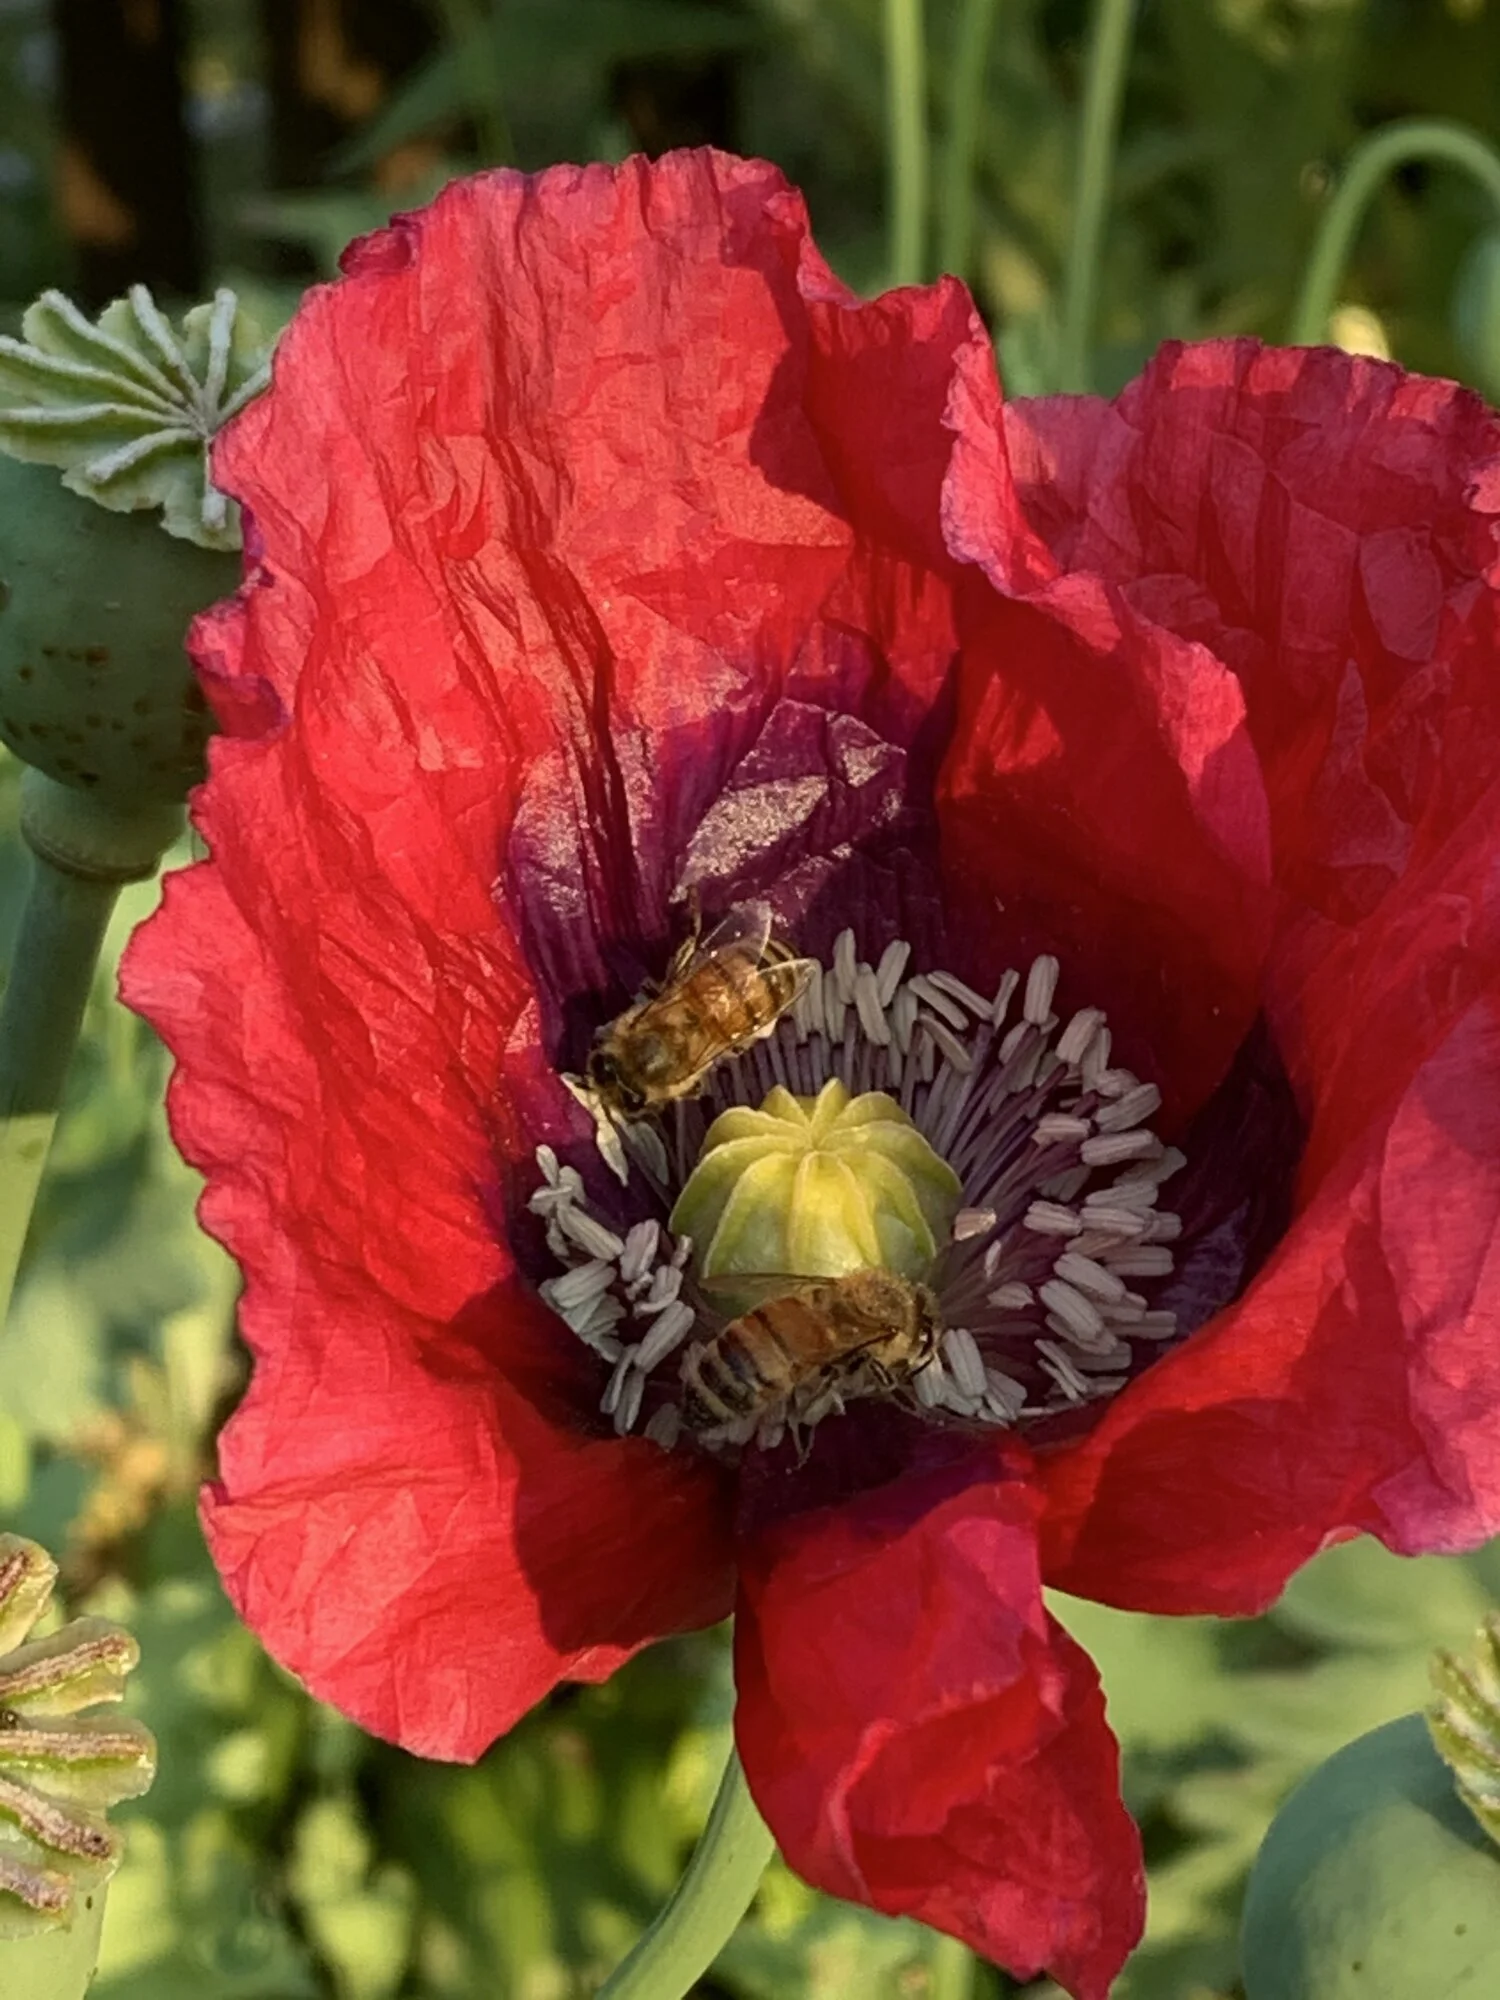
Allium, Anemone, Astilbe, Baptista, bee balm (Monarda spp.), bellflower (Campanula spp.), bleeding heart (Dicentra spectacles), butterfly weed (Asclepias tuberosa), Coreopsis, candytuft (Iberis umbellata), daffodil (Narcissus), feverfew (Tanacetum parthenium), flax (Linum usitatissimum), Geum, goldenrod (Solidago spp.), lamb’s ear (Stachys byzantina), Liatris, mint ( Mentha spp.), tansy (Tanacetum vulgare), tiger lily (Lilium lancifolium), primrose (Onagraceae sp.), oregano (Oregano vulgare), Oriental poppy (Papaver oriental), ostrich fern (Matteuccia struthiopteris), pinks (Dianthus caryophyllus), Pulmonary,  rhubarb (Rheum rhabarbarum), sage (Salvia officinalis), shasta daisy (Leucanthmum x superbum), soapwort (Saponaria officinalis), Scilla, sweet William (Dianthus barbatus), wormwood (Artemisia absinthium), Veronica, vinca (Catharanthus roseus), yarrow (achillea millefolium), and yucca. 

TREES AND SHRUBS:
American bittersweet (Celastrus scandens), Austrian pine (Pinus nigra), Barberry (Berberis spp.), Colorado blue spruce (Picea pungens), English hawthorn (Crataegus levitate), European white birch (Betula pendula), European beech (Fagus sylvatica), forsythias, honey locust (Gleditsia triacanthos), beauty bush (Kolkwitzia amaryllis), mugo pine (Pinus mugo), Norway spruce (Picea abies), white spruce (Picea glauca), red pine (Pinus resinosa), redosier dogwood (Cornus sericea), paper birch (Betula papyrifera), Russian olive (Elaeagnus angustifolia), Scotch pine (Pinus sylvestris), lilac (Syringa vulgaris), rosemary (Rosemaryinus officinalis), and lavender (Lavandula angustifolia).


ANNUAL FLOWERS:
Ageratum, basil (Ocimum basilicum), begonia (Brassica olerancea), blue salvia (Salvia guaranitica), dusty miller (Centaurea cineraia), Dahlia, four o’clock (Marbles multiflora), forget-me-not (Myosotis scorpioides), foxglove (Digitalis purpurea), geranium (Pelargonium x hortorum), heliotrope (Heliotropism arborescens), marigold (Calendula officinalis), morning glory (Ipomoea leptophylla), parsley (Petroselinum), Lobelia, poppy (Eschscholzia california), snapdragon (Antirrhinum majus), and Verbena.

Most county Extension Services have a list of regional plants that are generally less popular with visiting deer. No one can claim a plant is totally deer-resistant. Sometimes deer will take one big bite only to walk away, but the damage has often been done by then. The lists are a good place to start, though.  

I REMEMBER 20 YEARS AGO—I remember a wonderful spring day when my friend Patrick was touring my garden. We came upon the weeping snow fountain cherry. Each branch that brushed near the ground was nibbled off. At first, Patrick suggested it was the rabbits, but it was too high off the ground, at about two feet. I jokingly said, “If I didn’t know better, I would say it was the deer.” We both laughed because there was never, ever any deer in my neighborhood, or at least since the houses had been built in 1973.

A couple of days later, I was working on a story at my desk, and my son came running and yelling, “Mom, come quick! There is a deer in the back garden.” This was such a foreign sight to me that it might as well have been a kangaroo. Sure enough, there stood a deer eating the cherry. The next day we found a fawn sleeping under the cherry tree. While I don’t necessarily want my garden to become a deer feeding ground, it’s not often we have the opportunity to watch deer up close, and we considered ourselves fortunate to enjoy its presence. I also feel fortunate, she didn’t stick around!


Until soon,

Helen Yoest

Environmental Specialist

The Joslin Garden—"Outward Bound" Mulching; The Dream Team—5-20-21

Did you ever have a dream come true? Me either; well, not until today! If you remember, last week, Nell, Chris, and I started moving mulch from a HUGE mulch pile, just enough to get it off the street. Volunteer Aillene spread it for us. It took all we had to do that!

Mulch goals.jpg

My dream state during REM sleep was while I was still awake but with paralyzed muscles. (In case you didn’t know, most of your dreaming is during REM sleep. Your brain paralyzes your muscles during this time, so you do not act out the dreams.) And since I was awake, with muscles paralyzed, I had a dream. ;)

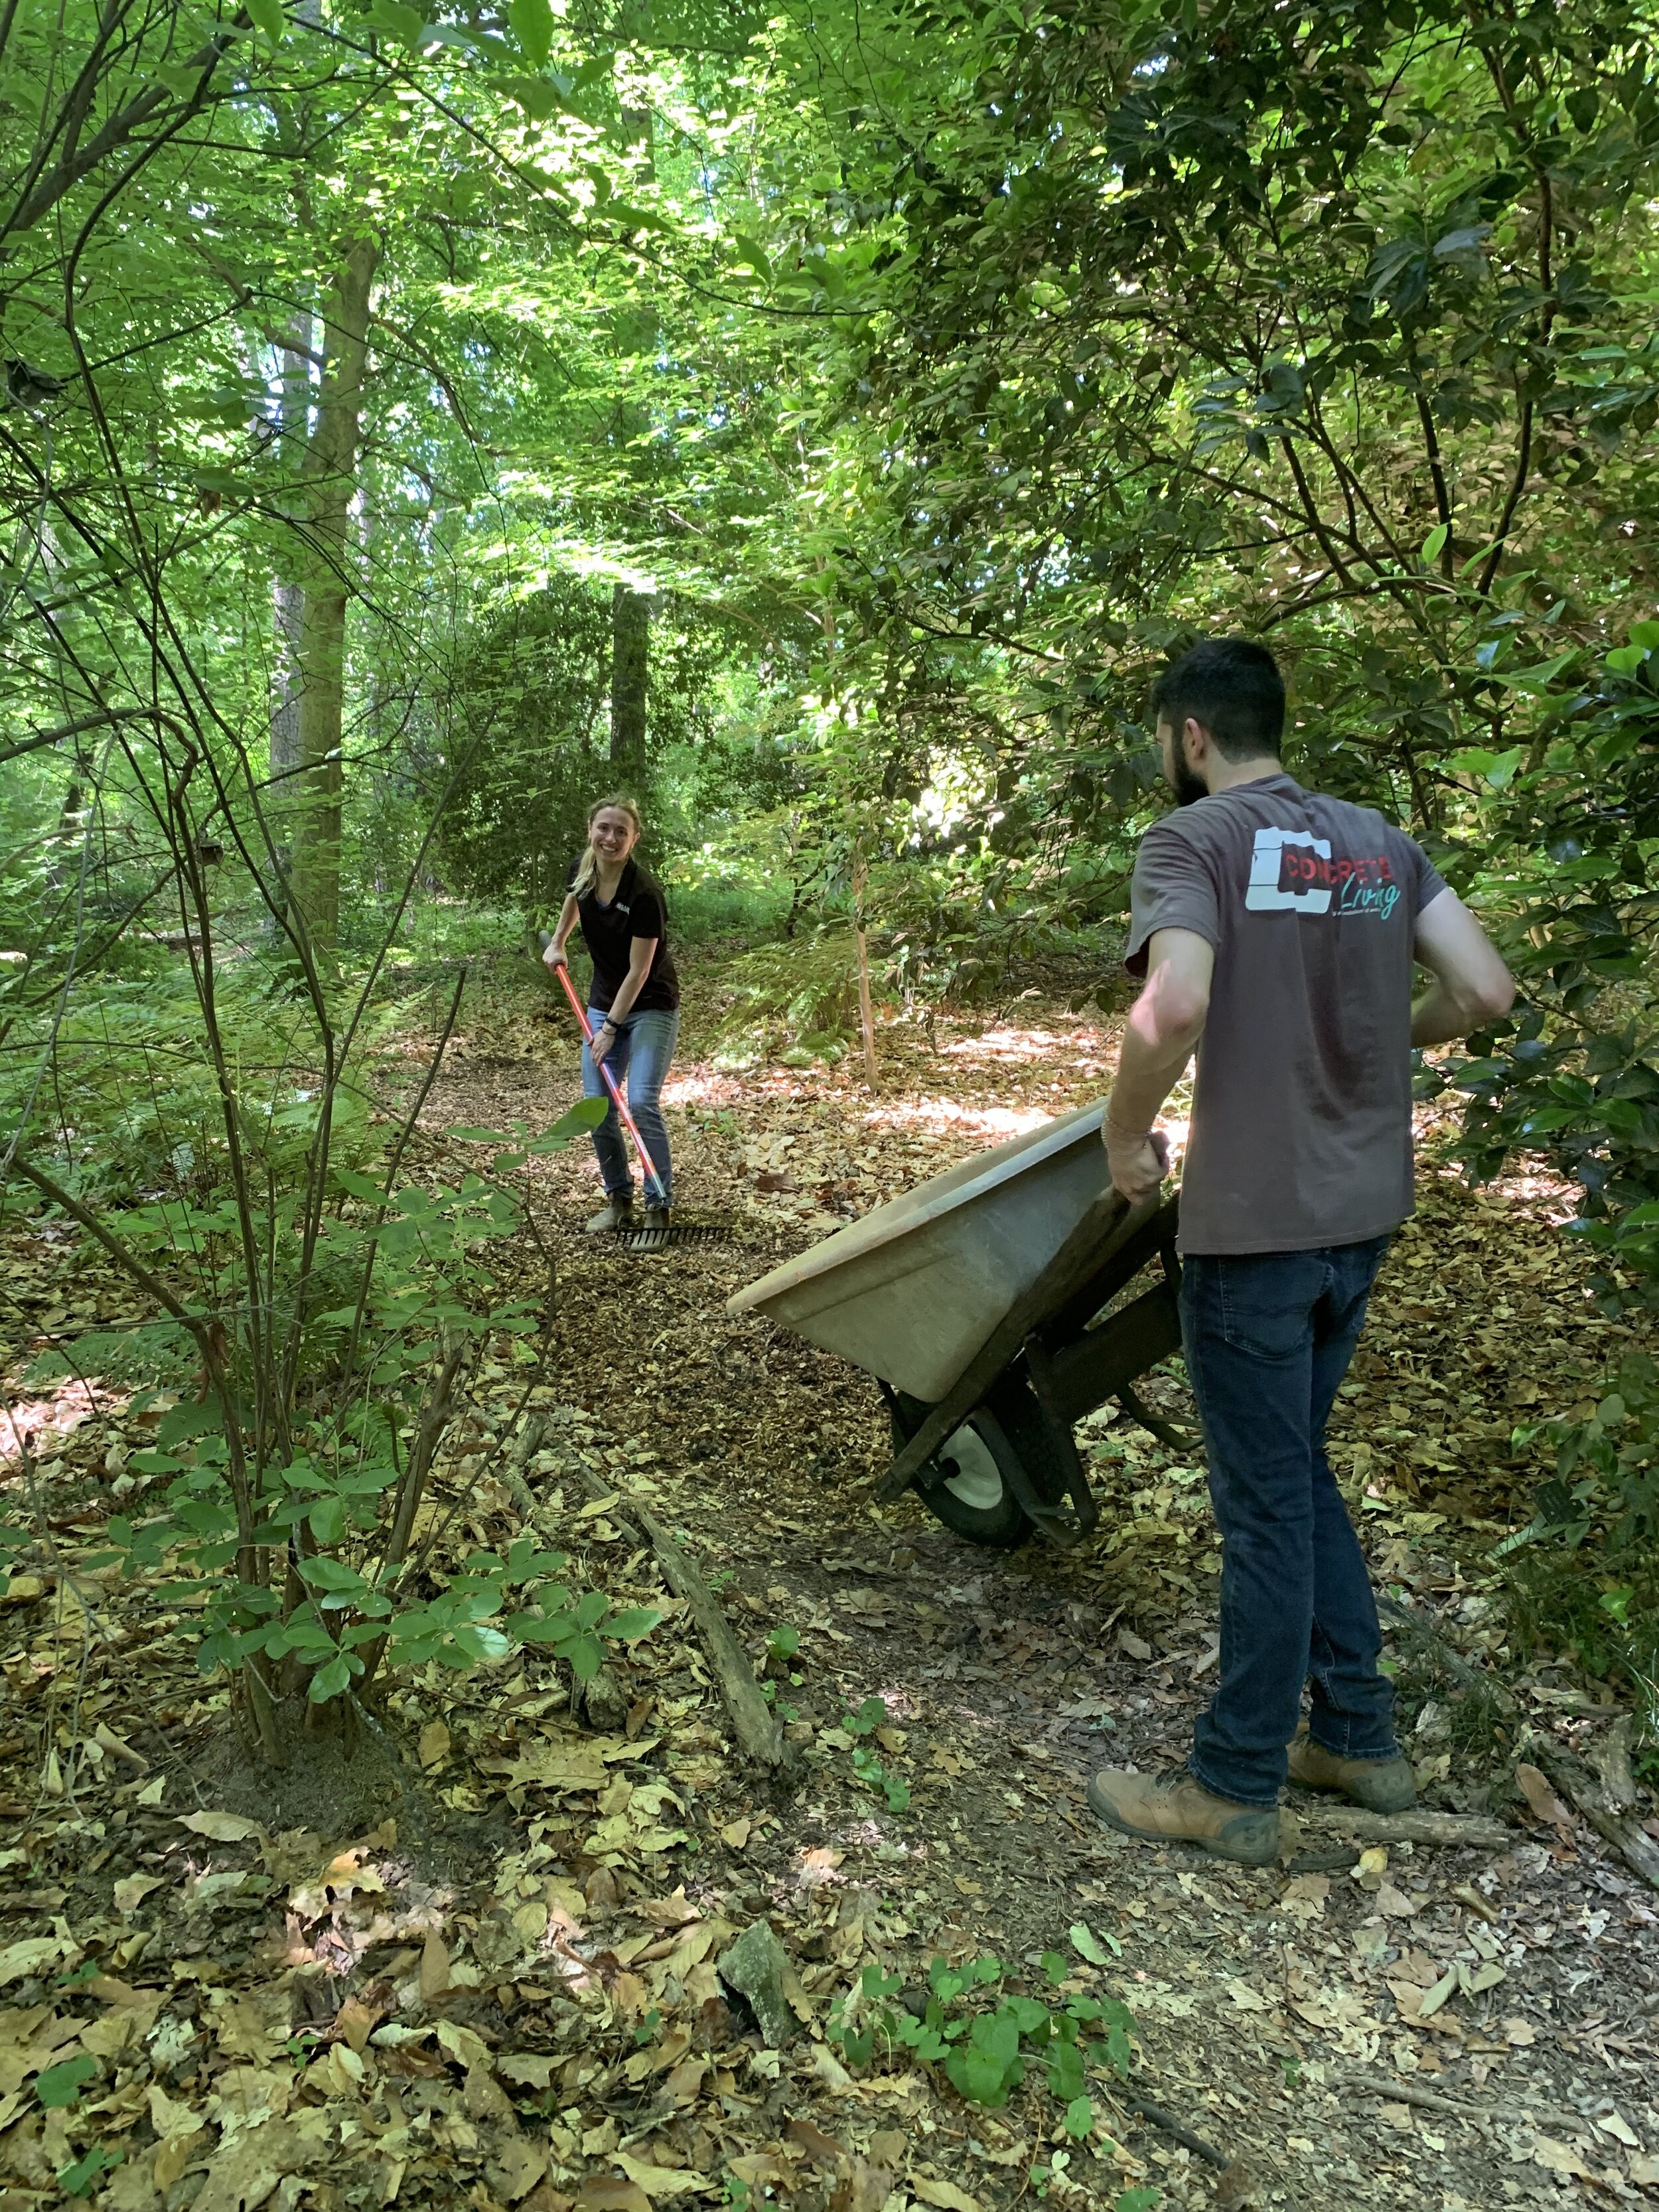
Walking up the driveway with a wheelbarrow full of mulch, I dreamed of a dozen or so strong backs and cheerful dispositions helping us move the rest of the mulch. Voila! Meet the Samet Corporation and Xylem BA Teams.

The DREAM Team! To say we couldn’t have moved this mulch without the help of these eager workers would be an understatement, but true. All were the outdoorsy type and it was clear from the start, it would be hard labor to mulch rough terrain paths. Upfront I told them to considers it “Outward Bound” mulching. With that, I heard cheers of “alright, awesome, right on! What a wonderful group!

The DREAM Team! To say we couldn’t have moved this mulch without the help of these eager workers would be an understatement, but true. All were the outdoorsy type and it was clear from the start, it would be hard labor to mulch rough terrain paths. Upfront I told them to considers it “Outward Bound” mulching. With that, I heard cheers of “alright, awesome, right on! What a wonderful group!

Our Dream Team made short work of our huge pile! The volunteer team was on-site from nine to noon, Of that time, after instructions from the City’s Volunteer Services Specialis, Olinda. Oliveira, breaks, and summation, this team worked about two and a half hours, but given we had 13 volunteers or 32.5 labor-hours, they managed to eliminate our pile.

Loading crew filling wheelbarrows while deliver dudes waiting and, no doubt, taking a deep breath!

Loading crew filling wheelbarrows while deliver dudes waiting and, no doubt, taking a deep breath!

Here is THE face of youth and strength. This young man look as fresh going up our “Outward Bound” hills as he did coming down!

Here is THE face of youth and strength. This young man look as fresh going up our “Outward Bound” hills as he did coming down!

Would you believe, each barrel-full of mulch was spread by smiling faces? Believe it!

Would you believe, each barrel-full of mulch was spread by smiling faces? Believe it!

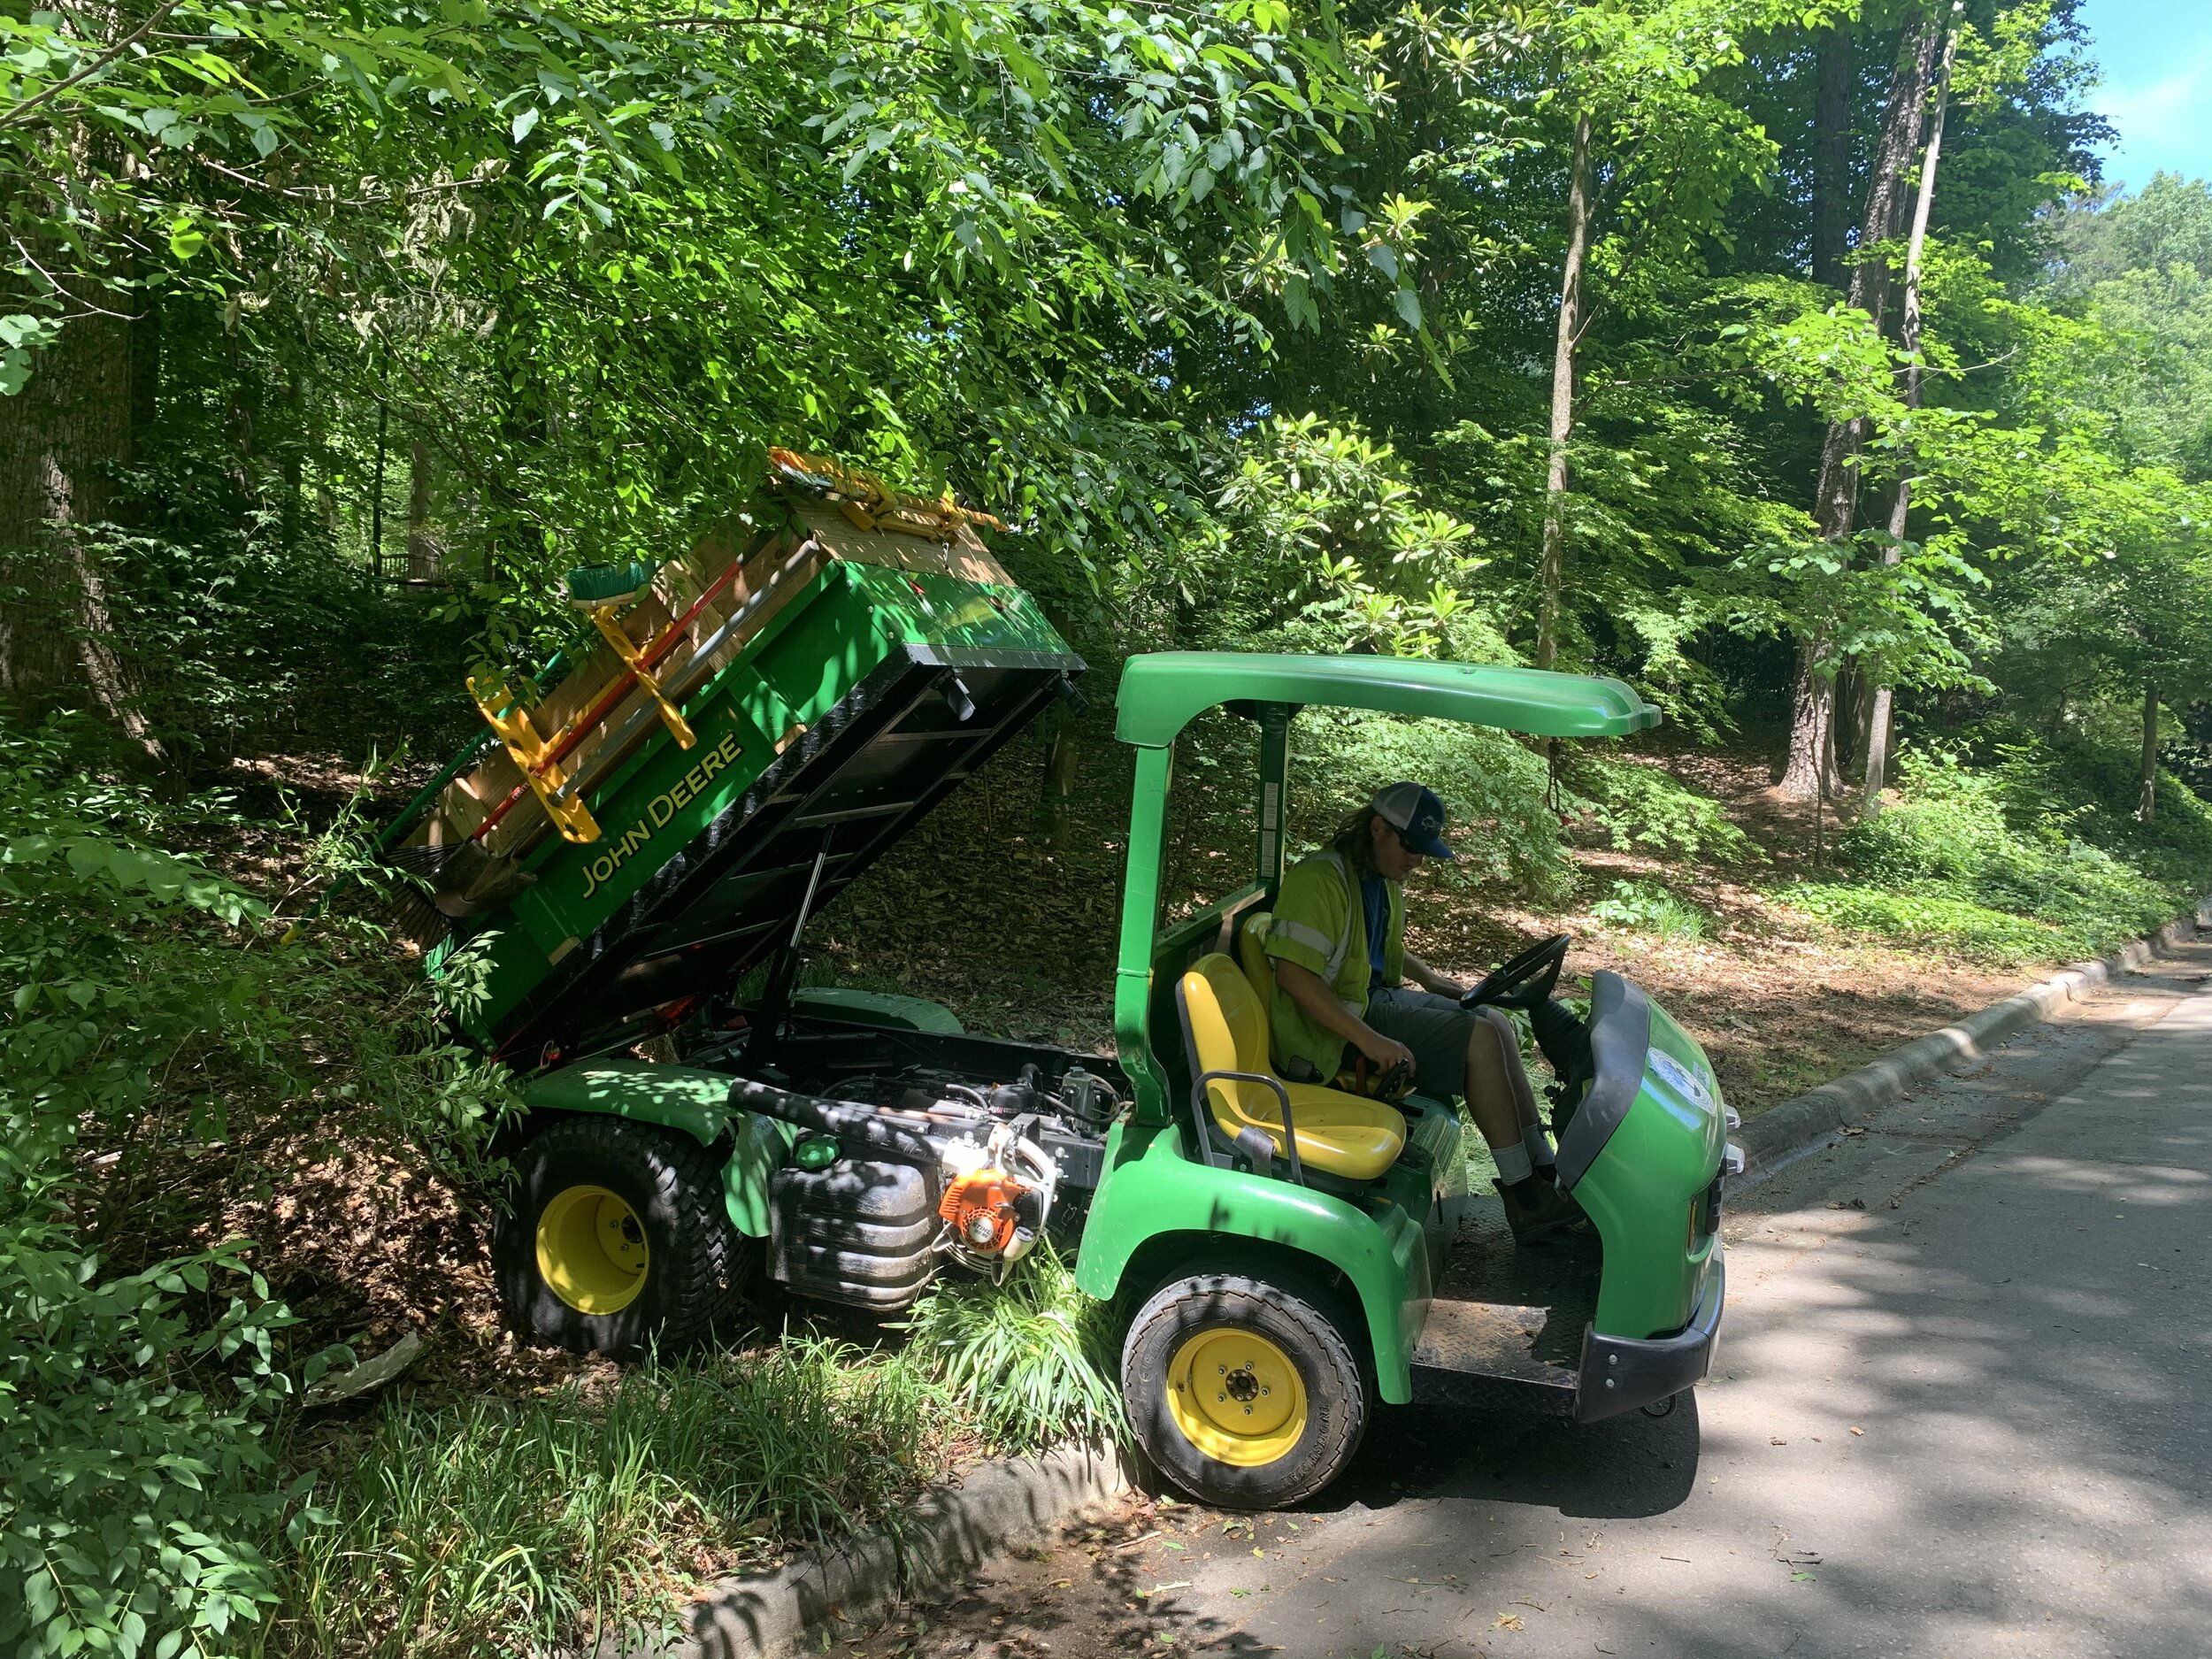
We also had help from one of the City of Raleigh’s Dream Teams, Neal Wisenbaker’s District 4. Neal provided us with a souped-up gator and operator, Teddy. I hope I can work with Teddy again soon! Amazing work ethic!

District 4 Operator Teddy and Helen Yoest. Note Helen has a Barbie-foot pose, and it looks like Teddy has a thigh-muscle pose ;) It was so wonderful to work with Teddy. Honestly, given where the pile was dumped, we couldn’t have done it without these two powerful machines—Teddy and souped-up Gator. Teddy estimates the gator can hold around eight wheelbarrows full of mulch, and he made six street runs to move the mulch around to the street behind us, so those barrels full could then be moved downhill.

District 4 Operator Teddy and Helen Yoest. Note Helen has a Barbie-foot pose, and it looks like Teddy has a thigh-muscle pose ;) It was so wonderful to work with Teddy. Honestly, given where the pile was dumped, we couldn’t have done it without these two powerful machines—Teddy and souped-up Gator. Teddy estimates the gator can hold around eight wheelbarrows full of mulch, and he made six street runs to move the mulch around to the street behind us, so those barrels full could then be moved downhill.

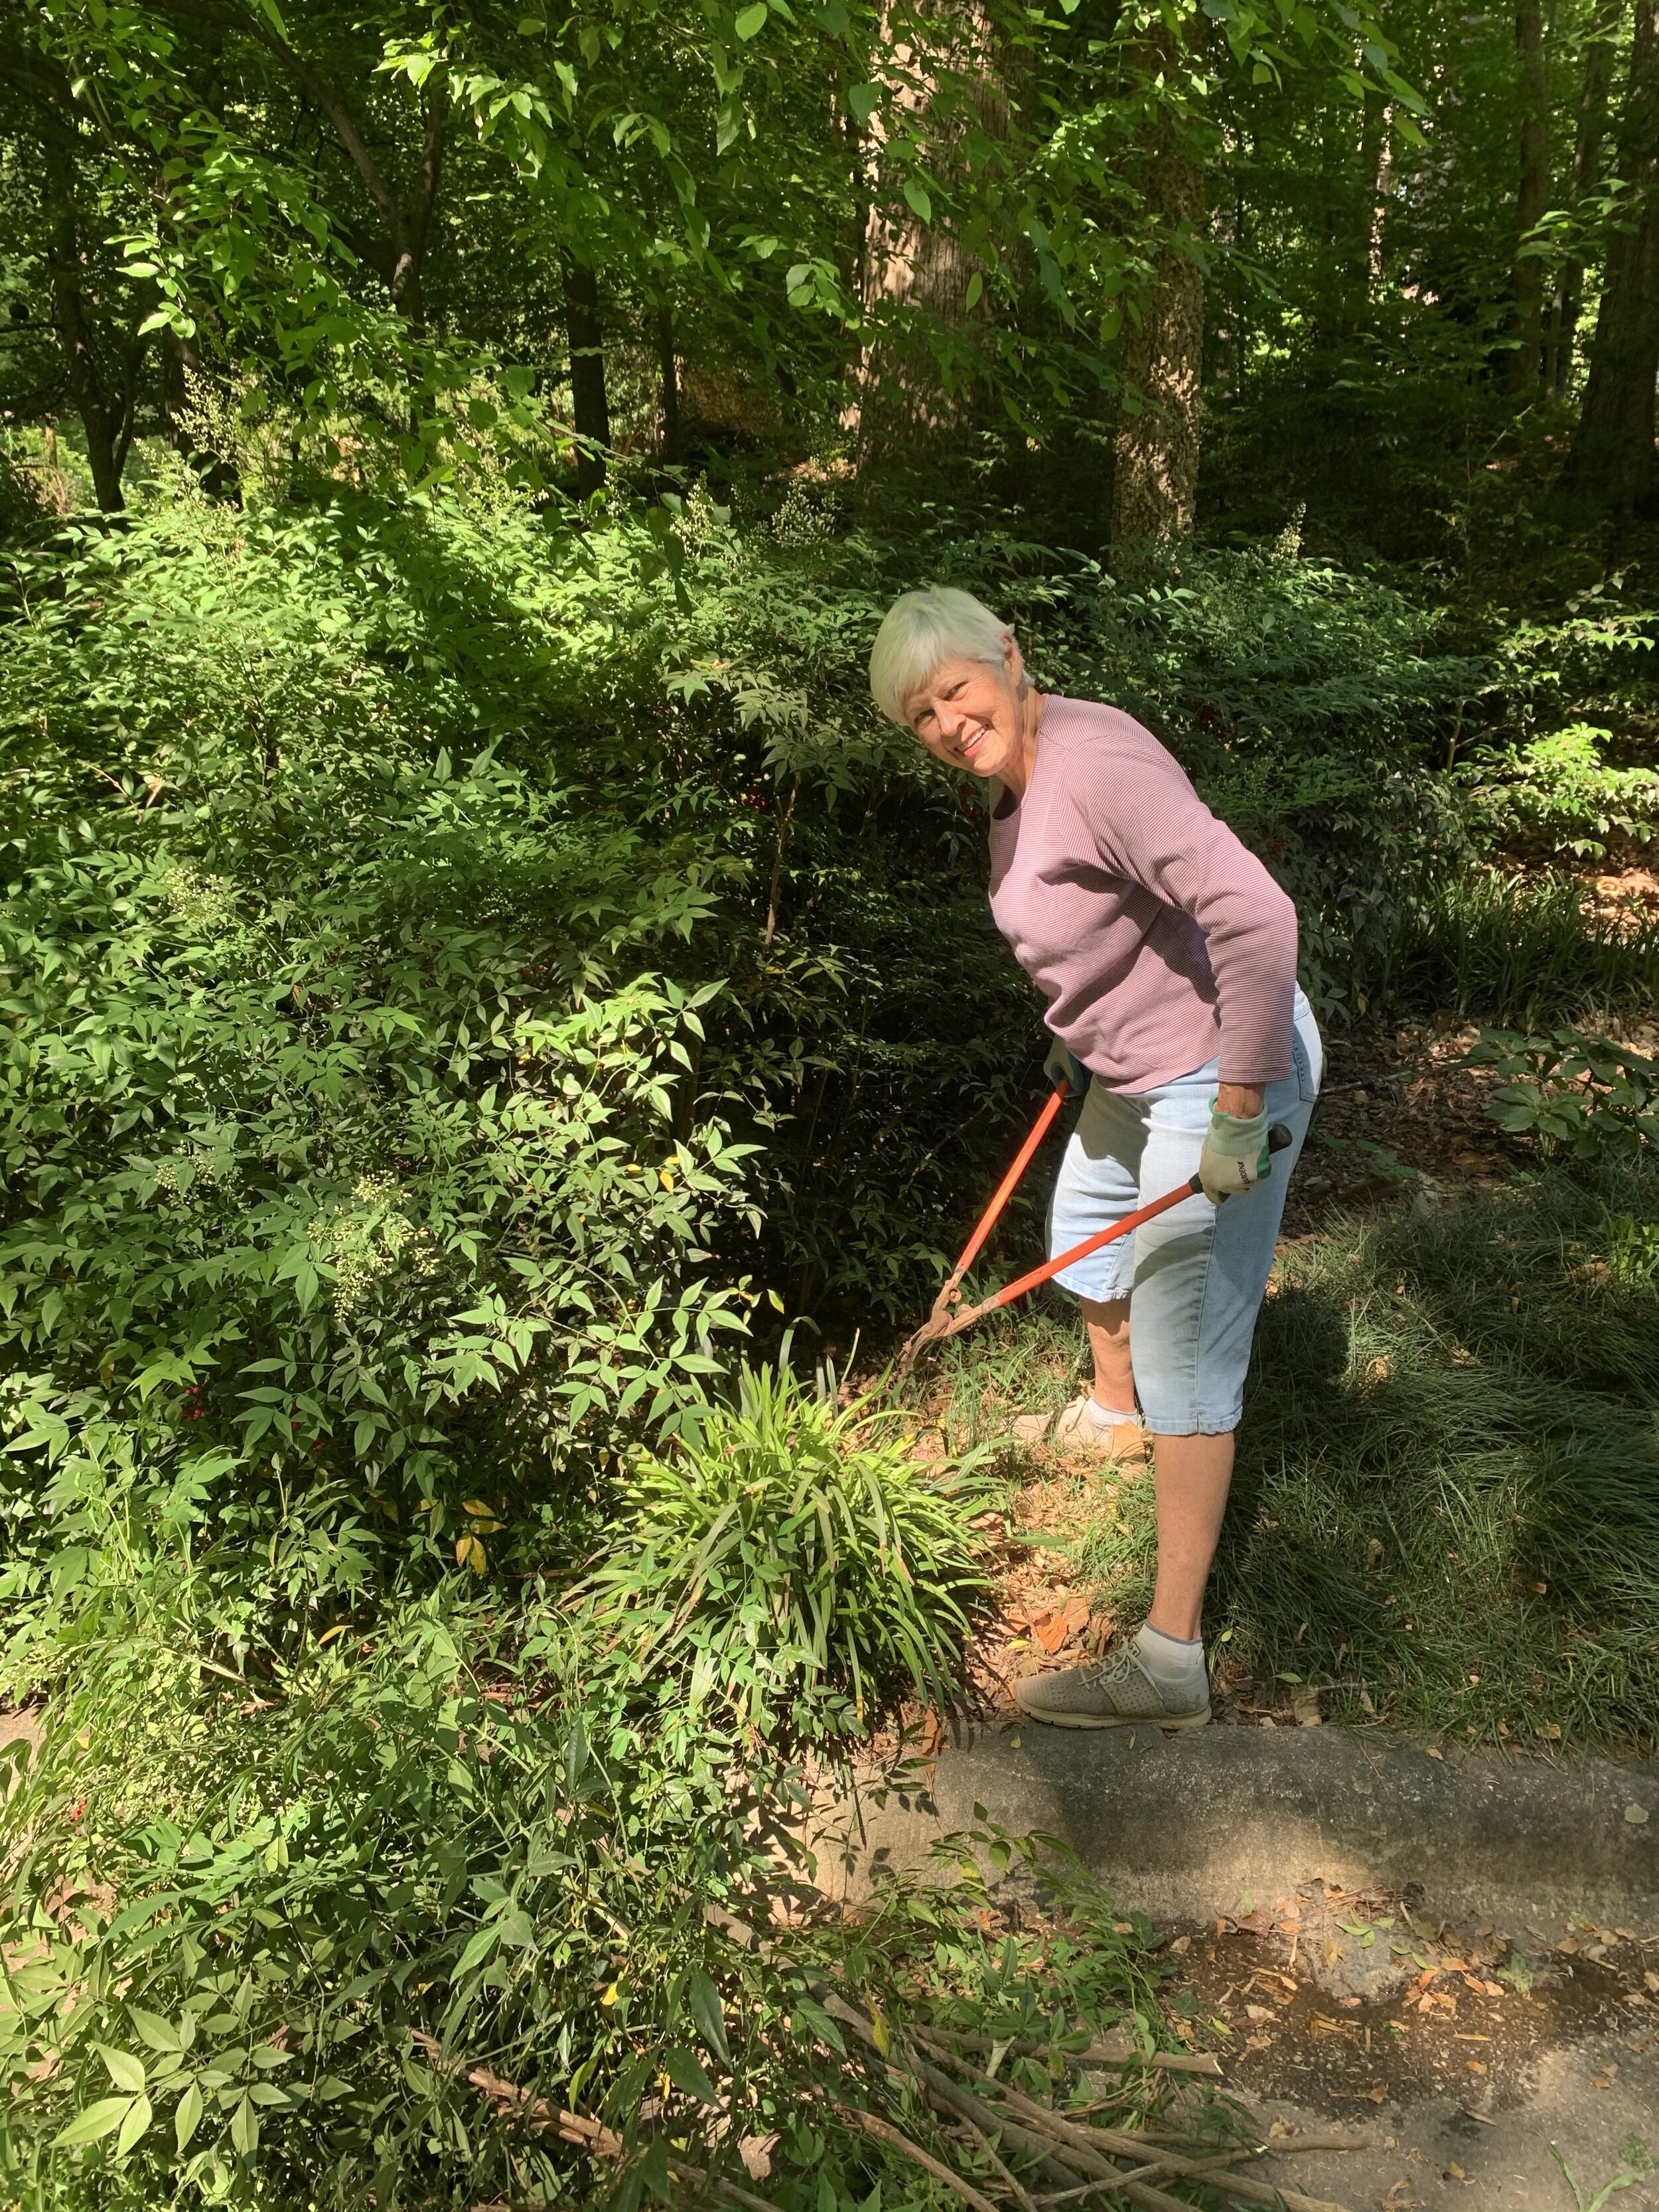
This last pile went to where Volunteer Aillene and I were working. Aillene was tasked with cutting down the invasive nandina, Nandina domestica.

This last pile went to where Volunteer Aillene and I were working. Aillene was tasked with cutting down the invasive nandina, Nandina domestica.

Volunteer Aillene making nandina piles.

Volunteer Aillene making nandina piles.

Volunteer Aillene’s results!!!

Volunteer Aillene’s results!!!

We then covered the stumps with heavy cardboard to smother the roots. This is a trick we learned from Nell Joslin.

We then covered the stumps with heavy cardboard to smother the roots. This is a trick we learned from Nell Joslin.

Additional smothering with a load of left-over mulch. We hope to never see this stand of nandina again!

Additional smothering with a load of left-over mulch. We hope to never see this stand of nandina again!

Volunteers are the backbone of any origination! If you are interested in volunteering for The Joslin Garden, please contact us! If you are interested in volunteering for the City of Raleigh, click HERE!

To see more pictures of this fine day, click HERE!

Until soon,

Helen Yoest,

Environmental Scientist

The Joslin Garden—We Huffed and We Puffed and Then Changed Our Tactics!—5-13-21

Every journey starts with the first step, or in this case a first fork full! We knew from the start it was beyond our abilities, with only three of us, Nell, Chris, and me to remove just the spillage from the street. Next week, thankfully, we’ll have 15 volunteers through the City of Raleigh Volunteer program to helps us haul and spread the rest. In the meantime, we needed to get it off the street! Not only was it a driving hazard, but the City also posted no parking signs due to a resurfacing program. Although, the timeframe was for a month-long period, the first date began on this day!

Our dumping site was not Chris’ ideal place to dump, but given The Joslin Garden will be hosting an Art Show and Sale this coming Sunday (all are welcome); it was decided the timing wasn’t right for dumping in the driveway.

Helen Yoest beginning the journey to wear us out today!

Helen Yoest beginning the journey to wear us out today!

As our early morning went on, we got in a routine, lasting just about an hour, if that! Nell was filling the wheelbarrows, I was hauling the full barrels, one at a time, around the street-side and up the driveway hill. I left them at the top of the hill where I relayed with Chris to then take the barrels further up the path to spread on paths. Wash and Repeat. That lasted for about ten wheelbarrows full.

Through deep breaths, Chris suggested we “only fill the barrels half full".” Great idea; as it was, I had to stop three times on the driveway hill just to catch my breath. And so we went for about another hour.

In the meantime, Nell, noting our efforts deduced, rightfully so, we would never have it moved off the street…[in our lifetime]! Nell starting loading and carrying the chips to the back of the mound. Finally, we got smart, and at this point, we actually counted the number of degrees between us! If I remember correctly, we totaled seven, or what it eight? I also failed to mention I have a minor as well, but the point was well taken. Ha!

We huffed and puffed for the last time that day.

The best part of going up the driveway hill was the view of these beautiful rhododendron blooms! I did find them more beautiful going down the hill than through my huffs and puffs going up hill with a full or even half full barrels!

Instead, we agreed to switch gears. We decided to fill the barrels and take up to the nearest paths to cover. There is a slight incline, but we were able to do so with full barrels.

Fortunately, Volunteer Art was there to help out loading along with Chris. I moved the barrels to stage the mulch along the path to later be spread.

Soon after Art’s arrival, Volunteer Aillene was also there, and she then spread the mulch on the paths.

Volunteer Aillene spreading the mulch on the paths.

Volunteer Aillene spreading the mulch on the paths.

With just-in-time volunteers, we managed to get the pile off the street.

#MulchGoals

#MulchGoals

It was now 11 AM. Time to do something we love to do—Weed! Yes, we love to weed, and I believe, we will have a life-time of joy in The Joslin Garden. For now were are trying to get it to the point of low maintenance.

I started with my all-time nemesis—porcelain vine, Ampelopsis brevipedunculata.

I started with my all-time nemesis—porcelain vine, Ampelopsis brevipedunculata.

Nothing is more satisfying than to find porcelain vine/berry and knowing you will soon stab the Earth to remove the tap root. I give you permission to twist the soil knife for personal gratification reasons, if you find the need. I did!

I have tried for decades to eradicate this invasive non-native from The Bee Better Teaching Garden. I’ve not had much success since there are ten acres behind me, mostly cultivated, but with enough woods along the back of my property for seeds to fall undetected from the birds droppings everywhere.

In my home garden, I do a decent search every year to see if I can fine it before it starts to vine up.

PLEASE DON’T PLANT THIS VINE! Yes, I’ve seen it for sale. One year , I traveled for a month with my children, and when I returned, half of my GIANT ‘Brown Turkey’ fig tree was covered. So much for figs that year.

Did you know porcelain vine is a GREAT wildlife plant? The birds love the berries. The bees devour the flower’s nectar and pollen. Still, #WeCanAllBeeBetter!~ Helen Yoest

Unknown.jpeg

What makes this vine so alluring to fearless or naive gardeners are the beautiful berries. Also, most people when they see the foliage think it’s a wild grape and lets it grow to see what it will do. When finding the gorgeous berries, they are trilled with their choice. It is not until it is to late when they realized they are doomed with this plant FOR-EVER!

Don’t say it. Don’t even think it—PLEASE— Euphorbia spp. is NOT pretty. It is an evasive weed. It lures you in with a pretty flower that has no respect for boundaries. It too has a taproot, but with recent rain, it wasn’t to difficult to get up from…

Don’t say it. Don’t even think it—PLEASE— Euphorbia spp. is NOT pretty. It is an evasive weed. It lures you in with a pretty flower that has no respect for boundaries. It too has a taproot, but with recent rain, it wasn’t to difficult to get up from the cultivated bed. Our ace volunteer Aillene made short work of this.

Next up was a nice patch of creeping Charlie, Glechoma hederacea. It’s not terribly hard to remove. One more patch down, @#^@!! to go.

While were enjoying out time, Nell was removing too much of a good thing, or at least it was once thought as one—Cow Parsley, Anthriscus sylvestnis. Another common name is wild chervil, or worse, mother-die. That can’t be good! Cow Parsley, is a herbaceous biennial or short-lived perennial, and blooming through Mother’s Day. What’s up with that!?!

Cow Parsley blooming in The Joslin Garden.

Cow Parsley blooming in The Joslin Garden.

The Joslin Garden—Leave it to Cleavers—5-6-2021

I had the most satisfying day working in The Joslin Garden today! Leave it to cleavers for making that happen.

Cleavers.jpg

The entire bank along W. Lake Drive was covered with Cleavers, Gallium aparine. Given I like large edit projects, which is why I took on The Joslin Garden, I wasn’t intimated. Is it OK to be proud of a good day’s work?

Cleared cleaver. It took me a solid five hours to clear. I had a bonus, tho. Andy our Mow Supervisor and his team came to mow today. I asked Andy if it was possible to use a weed whacker on the Bear claw hellebores, Helleborus foetidus seedlings. There were thousands! They would have been way worse to remove by hand than the cleavers were.

Cleared cleaver. It took me a solid five hours to clear. I had a bonus, tho. Andy our Mow Supervisor and his team came to mow today. I asked Andy if it was possible to use a weed whacker on the Bear claw hellebores, Helleborus foetidus seedlings. There were thousands! They would have been way worse to remove by hand than the cleavers were.

As it happened, it was good that I was there at the same time as the mow crew. I asked Andy not to mow our clover lawn. There was a lot of bee activity here, and we wanted to wait until the clover finished blooming.

As it happened, it was good that I was there at the same time as the mow crew. I asked Andy not to mow our clover lawn. There was a lot of bee activity here, and we wanted to wait until the clover finished blooming.

There are a couple of BIG patches of Green and Gold, Chrysogonum australe 'Eco Lacquered Spider'. The patch below is along side a path on the street side. It’s a spreader and was over growing the edging.

Green and Gold before edging.

Green and Gold before edging.

After hand edging the Green and Gold. The rock is lovely, right?

After hand edging the Green and Gold. The rock is lovely, right?

Aillene volunteered today. We both agreed the garden is starting to shape up. A little at a time, we are working our way through the overgrown and weeds, and removing invasive.

Ground orchid, Spathoglottis plicata. Some days we get so focused, we forget to see the beauty that surrounds us!

Ground orchid, Spathoglottis plicata. Some days we get so focused, we forget to see the beauty that surrounds us!

My obsession with having proper, well-run composts bins continues. Bin 1 is now officially CLOSED. By this we mean it is in good shape to use, but nothing more can be added. Any additions, like today’s grass clippings, went into Bin 2.

Bin 1 is officially closed for any added waste. We are now using it as compost for the various garden areas.

Bin 1 is officially closed for any added waste. We are now using it as compost for the various garden areas.

Volunteer Aillene started removing big sticks from Bin 2. It will take a couple of weeks work to clear all the sticks, but we will have the big stuff removed. Then we can continued to add cut up herbaceous materials, grass clippings, and leaves. This is all a process, and each week, we can see our progress!

Next week, we have another set of weeds to deal with. Everyday, we are making progress!

Until soon,

Helen Yoest

Environmental Scientist, M.S.

2021 May Garden Sustainable Stewardship Practices for the Southeast

As promised, Bee Better Naturally launched our first online course. We started with the Monarch butterfly entitled, How YOU can Help the Monarch Butterfly. Check us out! Our course is hosted on Thinkific, but you can access the link through our site under EDUCATION. Look for future sustainable courses.

The Joslin Garden—A Chill Day In the Garden on a Day Approaching 88ºF!—4-29-2021

It sure seems way to early to be so hot! The plants haven’t even acclimated, never mind us! Then again, I say this every year.

Chill, how? We remained cool in the dapple shade of The Joslin Garden. But also chill since it was only Nell and I in the garden. Our dedicated garden volunteers were busy. They were missed!

The Foundation had an event today from 1 to 4, so we decided to get back to the clearing out the Quadrants in the Formal Garden. Where I worked weeding a few weeks ago, unweeded itself.

I worked in Q2 and Q3. Calling them by their numbered Quadrants sounds fancy enough, but I need to look back to see how I named them. Anyhoo, Q2 and Q3 should be sufficient for now. I was pleasantly surprised to see so much Dutchman’s Pipe, Aristolochia spp. growing all around the Quadrants!

Aristolochia spp.

Aristolochia spp.

Did you know Dutchman’s Pipe is the host butterfly plant for the Pipevine Butterfly, Battus philenor?

As Nell and I were working the the Quadrants, we talked about Dutchman’s Pipe. The name comes from the look of, wait for it, a Dutchman’s Pipe. But do you know what a Dutchman’s Pipe looks like?

Mystery solved:

Dutchman’s Pipe. I’m thinking this common name is very much outdated. Sorta like the Henry Lauder’s Walking stick as the common name for the Contorted Filbert? Do you know who Henry Lauder was?

Dutchman’s Pipe. I’m thinking this common name is very much outdated. Sorta like the Henry Lauder’s Walking stick as the common name for the Contorted Filbert? Do you know who Henry Lauder was?

Here is an example of those funny Dutchman’s Pipe flowers. Put THAT you your pipe and smoke it! Do people even still use pipes, let alone going Dutch? Thankfully, I’m a live-long non-smoker. (Live-long was a typo; I was ready to correct when I figur…

Here is an example of those funny Dutchman’s Pipe flowers. Put THAT you your pipe and smoke it! Do people even still use pipes, let alone going Dutch? Thankfully, I’m a live-long non-smoker. (Live-long was a typo; I was ready to correct when I figured it fit the bill!) As such, I don’t keep up with smoker’s trends.

4Pipevine-Swallowtail_Cleburne_5JUN2018_Carolyn-Alexander.jpg

Nell shared with me, Pipevine Swallowtails come every year to lay their eggs. They frequent mine at home too. But we have not seen any yet. My friend Abby already has adults and eggs! Any day now!!

QUANDRANTS

This is a before shot of Q3. Alas, I got so focused, I forgot to get an after shot.

This is a before shot of Q3. Alas, I got so focused, I forgot to get an after shot.

COMPOST PILE

Compost Bin1 before turning

Compost Bin1 before turning

Perhaps I’m a little obsessed with our Compost Bin 1. I worked it. The City crew added grass clippings to the pile, and today I worked them in. As I dug down, I’m still finding sticks. Ugh!

I’m thinking of putting up a sign so folks know what they can and CAN’T put in there, along with penalties that reads:

Only cut up herbaceous plant material—no weeds.

Grass Clippings.

Dried leaves.

PENALITIES:

Sticks—2 hours of hard weeding. BTW, we have a wildlife stick pile right next to the Bins.

Rose clippings— Immediate removal by culprit with ungloved hands.

Weeds—I will personally remove them and plant in YOUR garden.

Ok, maybe not. Nell would never let me be so cruel!

On the way home from work, I stopped at Starbucks to see if they were still supplying gardeners with coffee grounds. Did you know, coffee grounds are a EXCELLENT Nitrogen source for a compost pile? Great stuff. The nitrogen helps break down the compost pile faster.

I use to routinely visit coffee shops for the used coffee grinds. I’m wasn’t sure if these shops were still doing this, so I stopped in a Starbucks to ask. I didn’t see any bagged used grinds for the Taking, as I would see in the past, so I asked about it. I never actually got an answer. What the barrister did do was pull her daily bag of grind waste with filters. Good Stuff. I’ll incorporated in into Bin 1 next week when I’m there.

Also next week, we need to have a come-to-bejeezers meeting with huge swaths of weeds. HUGE!

The chickweed is past getting rid of, but now that it is mixed with clever, we get to both at the same time.

Cleavers, Gallium aparine

Cleavers, Gallium aparine

Cleavers, Galium aparine. Cleavers get around. Cleavers are annuals with creeping straggling stems which branch and grow along the ground and over other plants. They attach themselves with the small hooked hairs which grow out of the stems and leaves. The stems can reach up to three feet or longer, and are angular or square shaped. The leaves are simple, narrowly oblanceolate to linear, and borne in whorls of six to eight branches.

There seems to be no end to the Creeping Charlie. It must go!

But worst of all, and my personal nemesis? Porcelain vine, Ampelopsis glandulosa var. brevipedunculata. Don’t bother learning its name, just get rid of it. Some folks mistake it for a wild grape. It is not. It’s a horrible invasive week and absolute beautiful iridescent berries in the fall. The birds love these berries and spread it everywhere. It is very hard to get rid of.

Porcelain vine.jpg

Until Soon,

Helen Yoest

The Joslin Garden—Earth Day—Our First Plant Sale—Cutting our Teeth and Chattering Them Too!

IMG-2985.jpg

What a wonderful day it was, albeit a little chilly! We had a great turnout, and learned this is something we will want to do each year. We will start potting up earlier and growing out seed. Since the suggestion donation was so low, no one left empty handed.

European+honey+bees+on+bread+poppies+in+the+Bee+Better+Teaching+Garden+with+Helen+Yoest.jpeg

We learned there was a huge demand for our bread-seed poppies. We will grow them out for next year! The first arrivals grabbed these.

64079112941--36E7B96E-3E69-4552-8D58-9C568D0C443F.jpg

Same with the Mayapples. I got some for me and my friend, Abby.

Thank you Volunteer Art Ross for helping out. We couldn’t have done it without out!

Nell and Chris, what an a great team we make!

Until soon,

Helen Yoest

Horticultural Specialist

The Joslin Garden—Meet Some of Our Superstar Volunteers—4-15-21

The Joslin Garden has a major following, and a much loved Nature garden where neighbors and regulars walk freely with their leashed dog, admire the vistas, and literally smell the roses. The #JoslinGarden is a gem in the center of Raleigh.

In addition, we have steady group of volunteers to dedicate their time once a week to help out in the 4+ acre PACKED property. We would love for YOU to join us!

Today, I want honor these individuals who not only have help out, but are are all becoming friends.

A see of Green & Gold, Chrysogonum virginianum

A see of Green & Gold, Chrysogonum virginianum

Volunteer Art potting up plenty for the plants for our sale on Earth Day, April 22nd.

Volunteer Art potting up plenty for the plants for our sale on Earth Day, April 22nd.

Beautiful iris

Beautiful iris

Volunteers Beth & Ailene

Volunteers Beth & Ailene

A sea of May Apples, Podophyllum peltatum and Trillium

A sea of May Apples, Podophyllum peltatum and Trillium

Volunteer Nell Joslin watering the recent pot ups for the plant sale.

Volunteer Nell Joslin watering the recent pot ups for the plant sale.

Look at the size of this trillium!

Look at the size of this trillium!

Chris, our Executive Director, was out today potting up plants, as was I. I think we are in good shape. So looking forward to Thursday April 22, 2021 EARTH DAY!

Helen Yoest, MS Environmental Scientist

Horticultural Specialist

Growing a Food Forest System in the Bee Better Teaching Garden

Apple, Malus ‘Transcendent’

Apple, Malus ‘Transcendent’

Most of us are familiar with forests as an ecosystem, hosting a diversity of plants, fungi, and insects. Deep in the forest, we see layers and niches. Think Tarzan swinging on three-inch diameter vines!

Imagine your forest system producing food, with the majority of elements in that system being productive.

By understanding how nature designs forest systems so they are self-maintaining and self-replicating, we can model that system with productive species to produce food in the most sustainable way. There would be a minimum amount of input and the maximum amount of output.

LAYERS WITHIN A FOREST

All forests have layers—canopy, over-story, under-story, shrub, herbaceous, root yield, as well as ground covers and climbers. Our food forest system can have each of these and give us food.

In traditional permaculture, a food forest system, one would grow a canopy cover, particularly a legume to richly fix nitrogen in the soil as the basis, and build under from there. As the canopy served its life, the biomass that remains is left to naturally decay or be broken up into the soil. 

In the Bee Better Teaching Garden, we skipped the canopy layer so we didn’t need to wait for something to die as our food forest system matured. Instead, we built the soil by adding four-inches of composted leaves each year. Mind you, I’ve been doing this since 1998; and I would encourage you to begin doing so do so as well, if you aren’t already adding an annual mulch. The productivity of our soil is constant and fertility is constantly increasing. 

Our garden planting focus is based on six layers— understory, shrubs, herbaceous/annuals, root yield, ground laver, and climbers, with edibles grown in each of these layers:

FF Cherry Tomatoes.jpeg


UNDER-STORY

The understory in the Bee Better Teaching Garden is made up mostly of fruit trees, including:

Apple, Malus domestica ‘Honeycrisp’ 

Kousa dogwood, Cornus kousa 

Peach, Prunus persica ‘Redhaven’

Pear Asian, Pyrus pyrifolia

Pear Asian, Pyrus pyrifolia

Pear Asian, Pyrus pyrifolia

Pear, Bartlette pear, Pyrus communis x P. pyrifolia ‘Kiefer’

Persimmon,  Diospyros kaki  ‘Fuyu’ 

Plum, Prunus salicina ‘Santa Rosa’ 

Paw Paw

Paw Paw

Paw Paws, Asimina triloba

Sassafras, Sassafras albidum

Quince, Cydonia oblonga ‘Pineapple’

SHRUB

Beautyberry, Callicarpa amaericana

Camellia tea plant, Camellia sinensis var. sinensis

Goji, Lycium barbarum 

Goumi, Elaeagnus multiflora

Bayleaves, Laurus nobilis

HERBACEOUS/ANNUALS 

The herbaceous plants change out during the seasons, with kale and lettuce in late winter/early spring, and basil and tomatoes in the heat of the summer. I also self sow sesame and buckwheat, and have done other edibles as well. 

Garlic yeild

Garlic yield

ROOT YEILD

The produce in the root yield also changes out during the seasons. Onions, carrots, garlic, and even peonies! But, no, I grow peonies for the flowers, although the petals can be used for a nice tea, but yes, the roots are edible!

GROUND LAYER

Peanuts, Arachis hypogaea, which are technically a root yield, as well, plus rosemary, Salvia rosmarinus and strawberries, Fragaria × ananassa ‘Ozark Beauty’ 

CLIMBER

Malabar spinach, Basella alba

Muscadine grape, Vitis rotundifolia

Elsewhere on our 1/2 acre, we have: 

Apricot, Prunus armeniaca ‘Garden Annie’

Apple, Malus pumila ‘North Sentinel’

Banana, Musa spp.—use leaves for steaming food

Blackberries, Rubus fruticosus ‘Apache’ andArapaho’

Blueberries, Vaccinium ashei ‘Premier’, ‘Climax’, & ‘Powder Blue’ 

Cherry, Prunus avium ‘Stella’ 

Chives, Allium schoenoprasum

Chokeberry, Aronia melanocarpa 

Chokecherry, Prunus virginiana

Figs, Ficus carica, ‘LSU Purple’, ‘Brown Turkey’, and ‘Celeste’

Guava, Psidium cattleianum ‘Strawberry’

Plum ‘Corinthian’, Prunus persica hybrid Corinthian’

Kiwi ‘Issai’, Actinidia arguta ‘Issai’

Loquat, Eriobotrya japonica—Every year there are interesting flowers, loved by bees, but no fruit. We can grow kumquat in our area, with evergreen leaves and fall to winter flowers. However, fruiting will not occur if temperatures drop to 25ºF or below. 

Passion vines, Passiflora incarnata and the tropical P. edulis

Raspberries ‘Southland’, Rubus idaeus ‘Southland’

Serviceberry, Amelanchier × grandiflora ‘Autumn Brilliance’

Of course, we also have eggs.

FF Eggs.jpg

The Joslin Garden—A Potting Up Party—April 8, 2021

Everyone loves a party, right? I know I do, but I had to miss today’s party. Still recovering, and on light duty from last week’s fall. I still managed to be helpful by working on the plant sale spreadsheet so Chris, our Director, can make labels, and of course, writing this weekly post!

Volunteer Ailene potting up Ostrich Ferns, Matteuccia struthiopteris This is one of my favorite plants. Did you know ostrich fern fiddleheads are edible? Yummy sautéed in a little butter.

Volunteer Ailene potting up Ostrich Ferns, Matteuccia struthiopteris This is one of my favorite plants. Did you know ostrich fern fiddleheads are edible? Yummy sautéed in a little butter.

Volunteer Art potting up acorus,  Acorus gramineus 'Ogon'

Volunteer Art potting up acorus, Acorus gramineus 'Ogon'

Acorus waiting for a new home!

Acorus waiting for a new home!

See below what we’ve potted up so far. There is more to come. Be sure to check back next week for more additions.

Screen Shot 2021-04-08 at 12.50.00 PM.png
Screen Shot 2021-04-08 at 2.34.40 PM.png
.

.

The Lady Banks Rose opening! Rosa banksiae

The Lady Banks Rose opening! Rosa banksiae

Azaleas starting to POP!

Azaleas starting to POP!

I missed working with my buddies in the garden today! This was the first Thursday I missed. So sad. Nell sent me these pictures, but where is Nell?

Nell Joslin, Board Chair, naturally camera shy, so I took this off the Foundation’s website

Nell Joslin, Board Chair, naturally camera shy, so I took this off the Foundation’s website

The Joslin Garden—All Hands on Deck with One on the Concrete—April 1, 2021—April Fool's Day

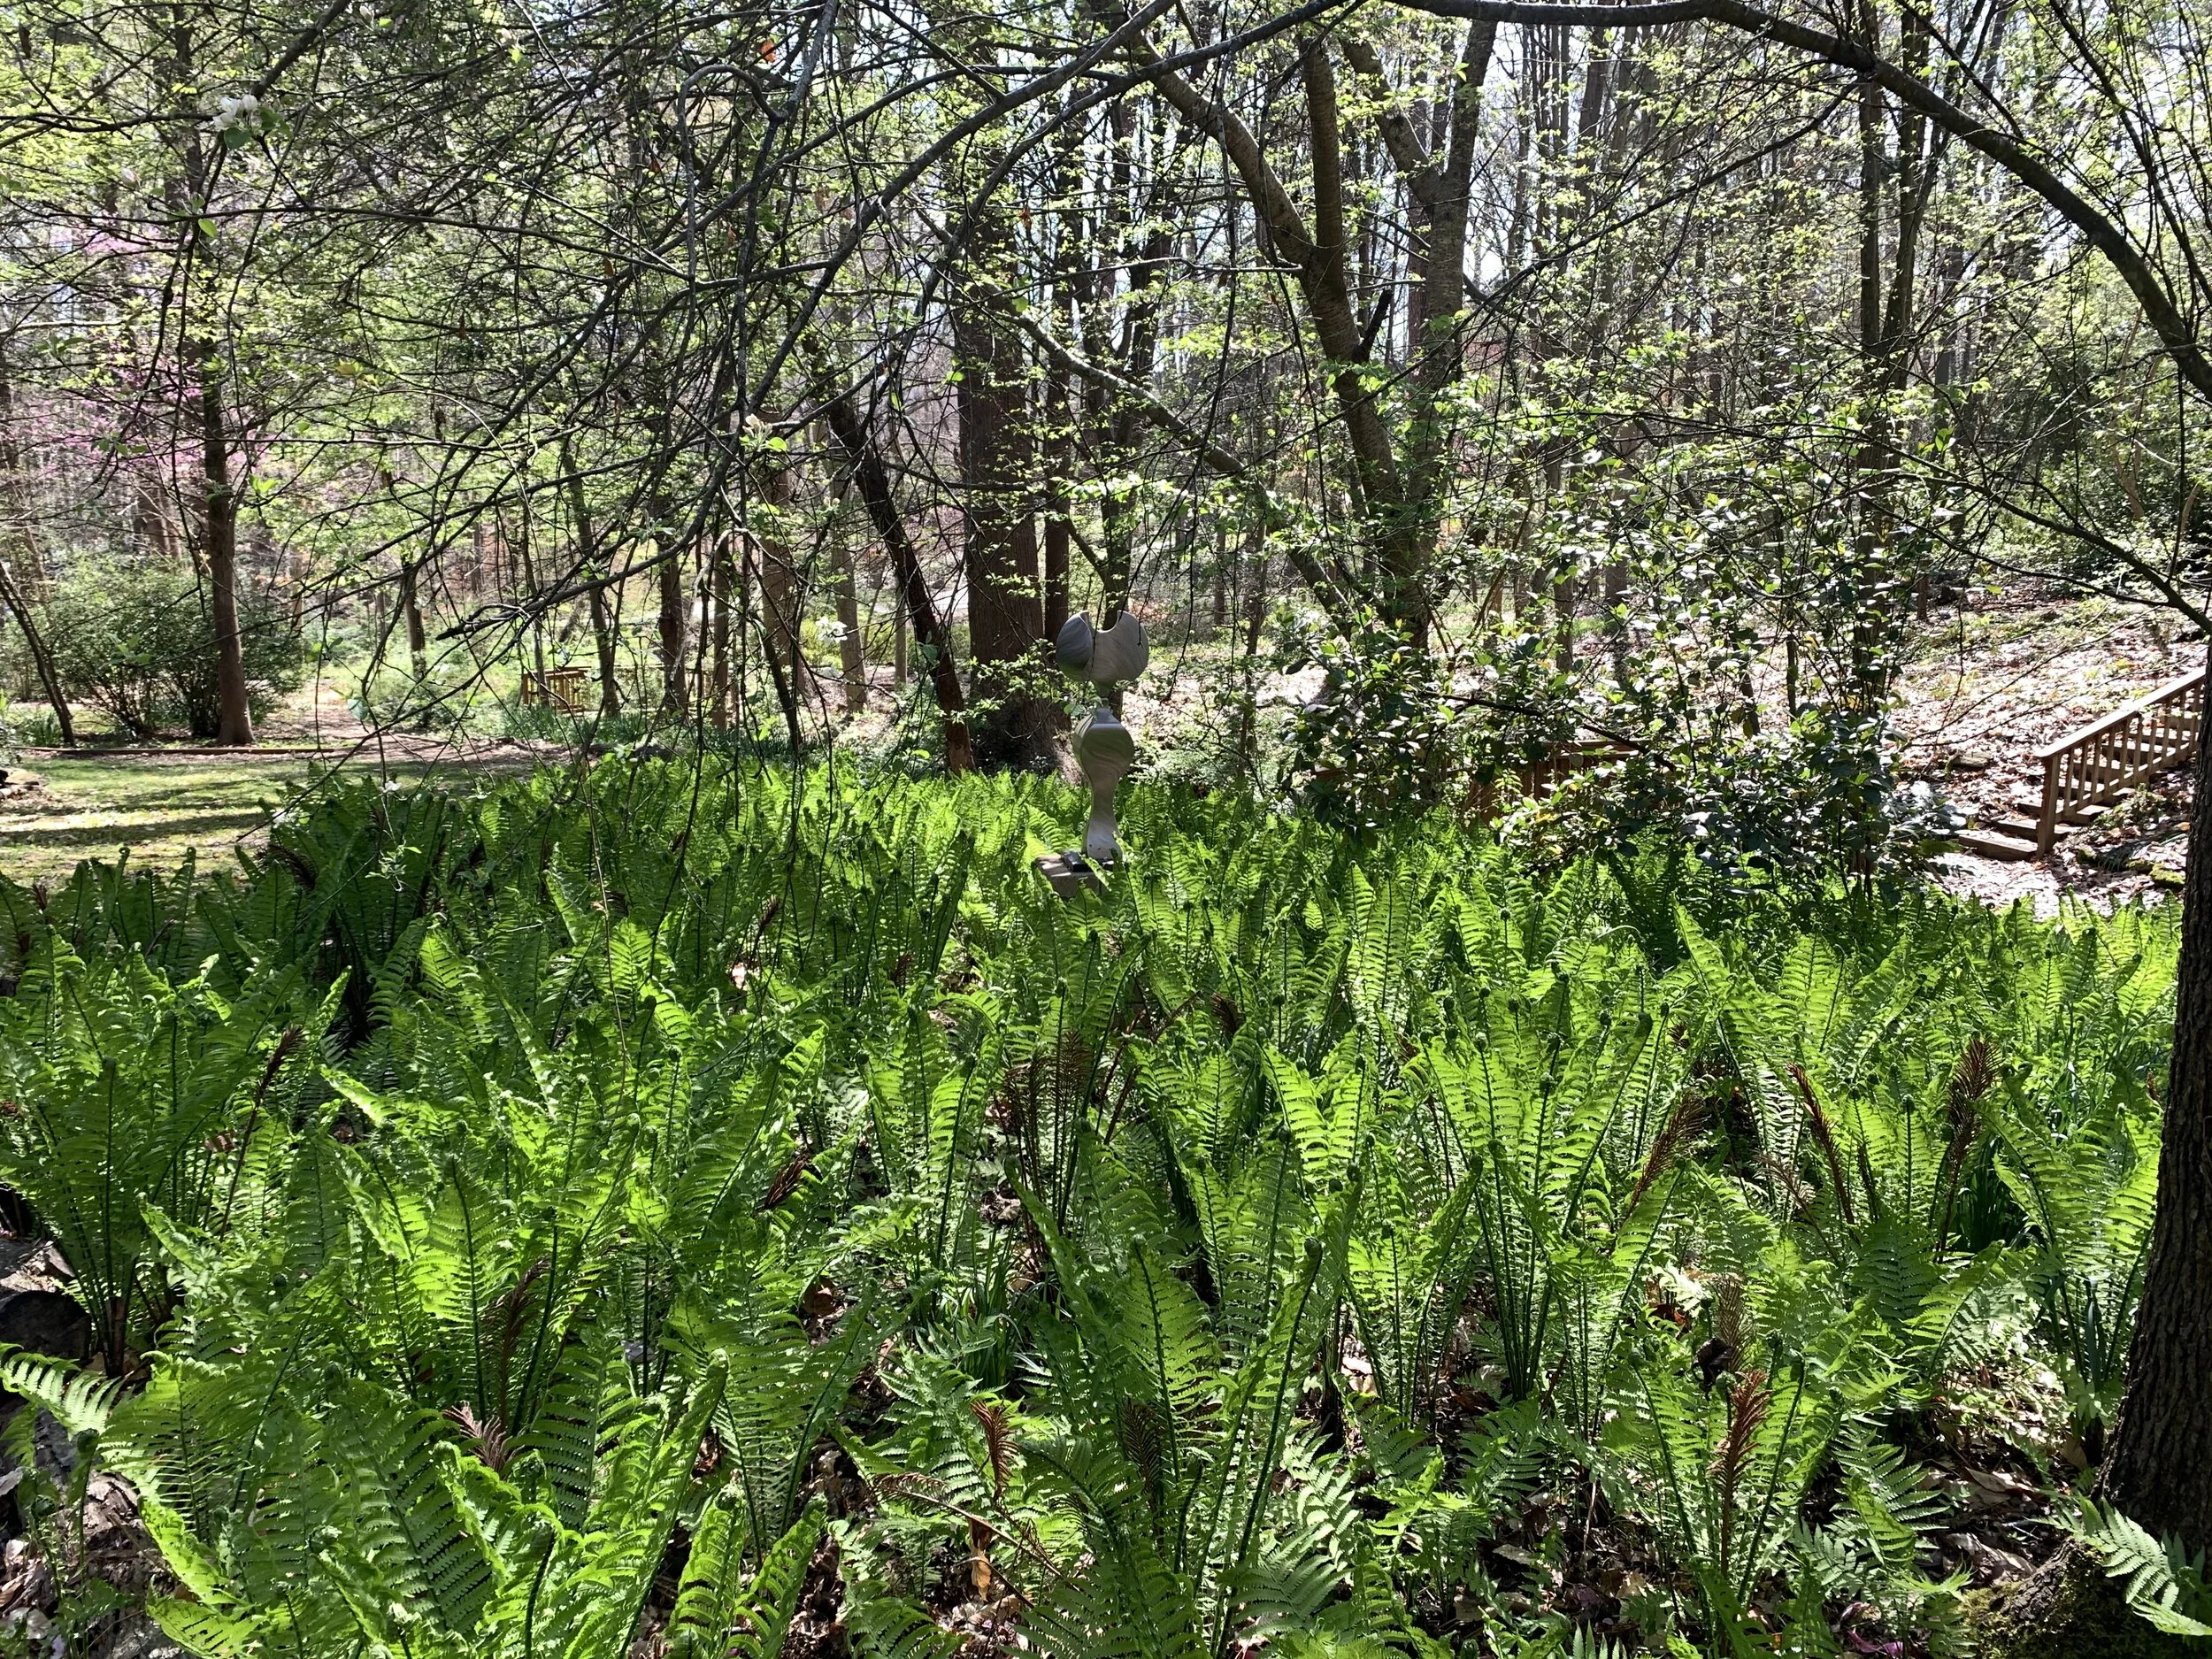
Ostrich fern, Matteuccia struthiopteris. We will have several of these for sale at our plant sale, April 22nd. Stay tuned. At home, I’m totally going for this look. I have a puny patch at home. I want my patch to look like this! Don’t worry, you wil…

Ostrich fern, Matteuccia struthiopteris. We will have several of these for sale at our plant sale, April 22nd. Stay tuned. At home, I’m totally going for this look. I have a puny patch at home. I want my patch to look like this! Don’t worry, you will have first pick. I’ll only buy what is left. But this is my goal. Frankly, this should be everyone’s goal. Mass plantings ROCK!

Today may be April Fool’s Day, but we didn’t fool around, albeit we worked at a slower pace, or at least I did.. It was all hands on deck! As we get closer to opening the garden for groups, and for our plant sale, we were focusing on the entrance area and the Formal Garden. So what did we do? Mulched! I’m crazy about mulch. We weeded and mulched the Formal Garden and the Entrance Beds, both sides.

It was ALL due to our dedicated volunteers. I wasn’t able to help much, but I did what I could. Why? While working Tuesday in Moore Square, I tripped and face-planted on the concrete. Ouch!

Unsuspecting volunteers arrived only to find, we (I) had a steely focus. It scares my husband when I get like this! haha My focus didn’t scare them away, tho. (David, honey, come take a lesson!) We needed to be all hands on deck to weed beds and lay compost, which we are using as mulch.

Volunteer Ailene potting-up orange form ginger lilies, Hedychium aurantiacum between spreading compost

Volunteer Ailene potting-up orange form ginger lilies, Hedychium aurantiacum between spreading compost

Ailene’s handy work before potting up! Be sure to come early. Times will be announced soon!

Ailene’s handy work before potting up! Be sure to come early. Times will be announced soon!

Volunteer Nell weeding The Formal Bed, quadrant 2.

Volunteer Nell weeding The Formal Bed, quadrant 2.

Chris, our Executive Director, helping out again. We agreed the edge of the driveway would benefit from a weed barrier. You see, even with a manufactured weed barrier down, we still had tons of weeds. We hope blocking sunlight with mulch will stop o…

Chris, our Executive Director, helping out again. We agreed the edge of the driveway would benefit from a weed barrier. You see, even with a manufactured weed barrier down, we still had tons of weeds. We hope blocking sunlight with mulch will stop or slow germination.

Next week, I promise to get pictures of our volunteers upright!

Before we could do this, Bin 1 needed clearing out. There were still to many stick slowing things down as we stuck a fork in the compost to retrieve. Since I’m on light duty since the accident, I thought I could best help by removing sticks from the compost pile. This made it easier for the volunteers, particular Art who took charge of the retrieval, to access. I was remiss in getting a picture of Volunteer Art hard at work. But I did have some lovely conversations with him.

Volunteering in The Joslin Garden is a great way to some meet very interesting people! Wont you join us?

Then Nell and I decided it would be a good use of my time to do an educational component. Read on.

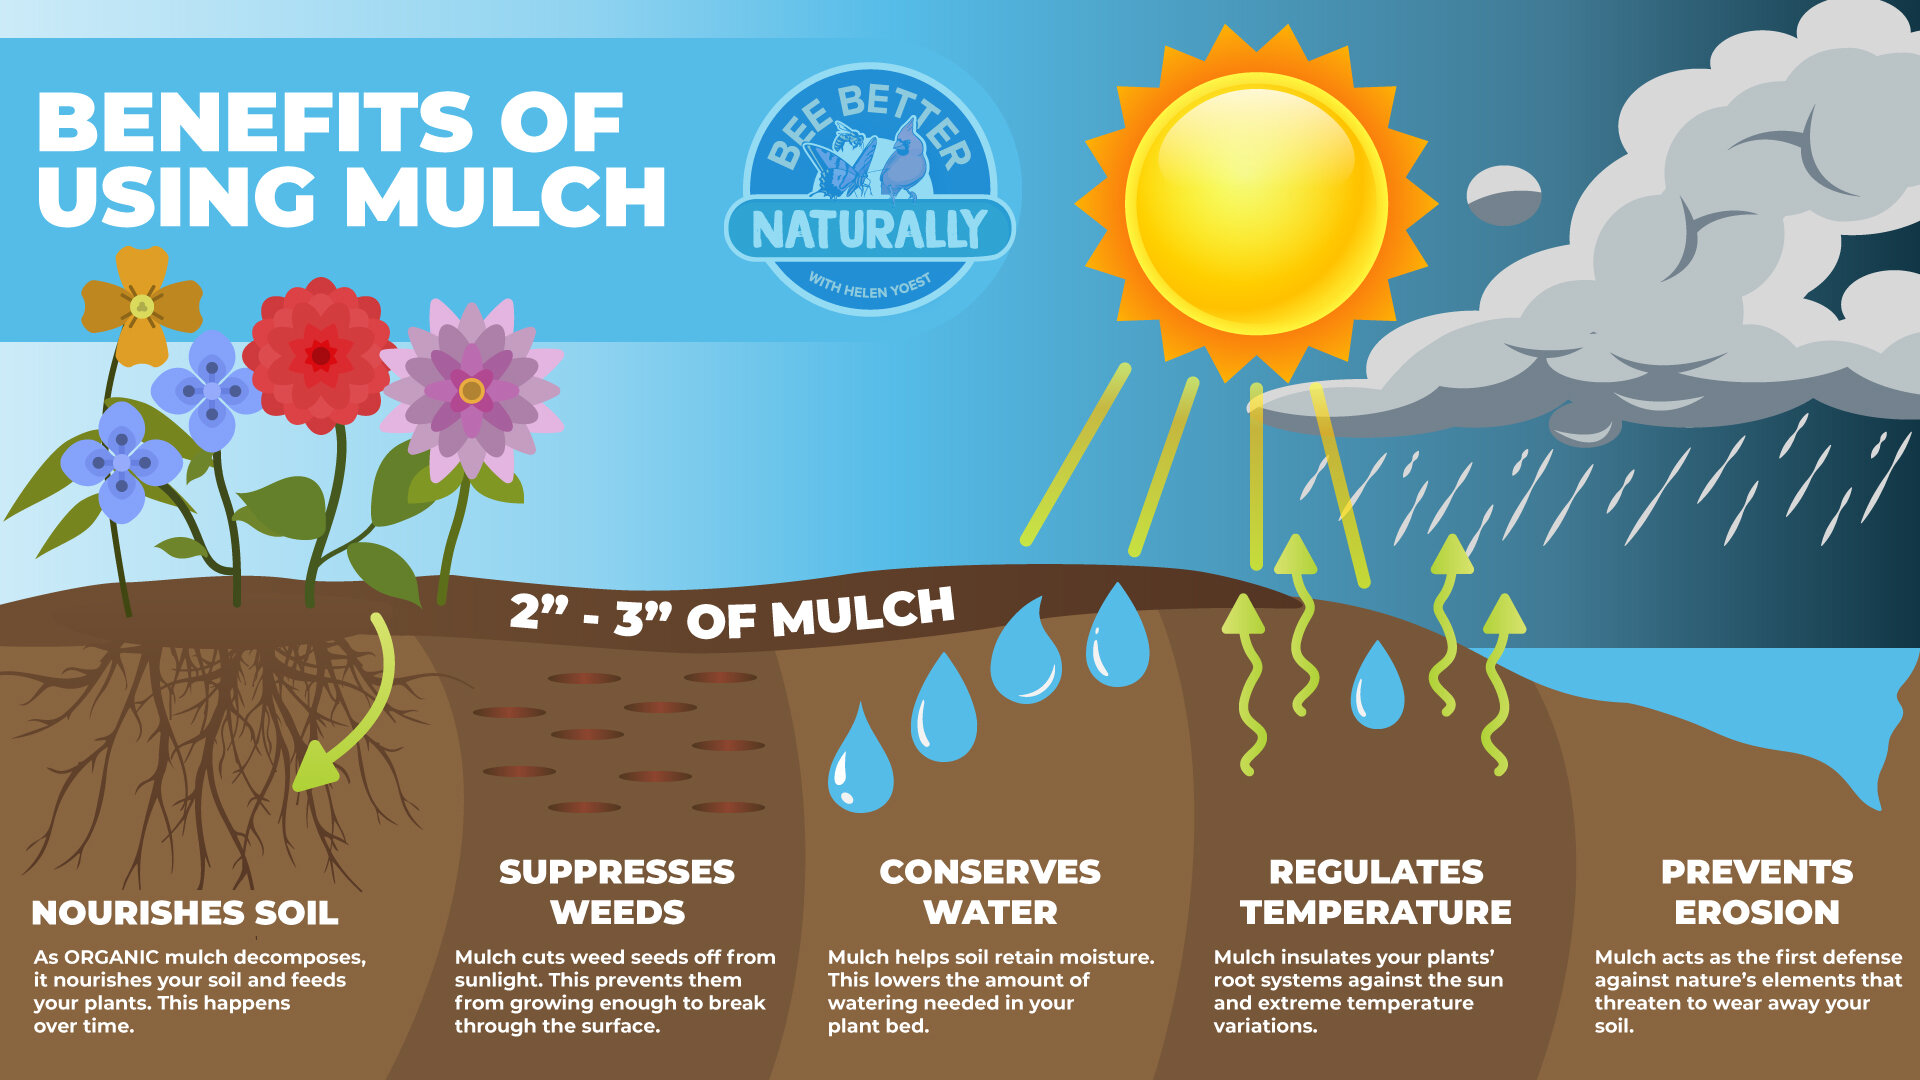
Do you know the importance of mulch?

Benefits-of-Using-Mulch.jpeg

SOIL NUTRITION

It shouldn’t be a surprise to know organic mulch nourishes your soil.  As mulch breaks down overtime, it will also need to be replenished, typically annually.  Your plants benefit from the healthy soil, and you benefit from a healthy landscape.

WEED SUPPRESSION

Two to three inches of organic mulch suppresses weed growth by blocking sunlight which geminates weed seeds. Not always, but better than no mulch, weeds are not strong enough to push through the mulch layer. 

WATER RETENTION

A good layer of mulch helps retain water retention, keep plants moist for longer between watering. During the heat of the summer, this becomes very important.

TEMPERATURE REGULATION

Mulch regulates soil temperature, keeping soil cool in the summer and warmer in the winter, preventing the ground from heaving.  

PROTECTION FROM EROSION

Mulch acts as the first line of defense against the elements that threaten to wear away your precious soil.

TYPES OF MULCH

The range of organic mulch varies from shredded tree bark and trees, to composted leaf mulch, which is my preference. Compost is also very useful, and is what we currently have on hand. 

I truly believe in the power of mulch!

Until Soon,

Helen Yoest

Horticultural Specialists

Environmental Scientist, M.S.

2021 April Garden Sustainable Maintenance Practices for the Southeast

Now we’re talking!!! April is when we can finally plant annuals and summer veggies!

A year ago, Bee Better Naturally with Helen Yoest launched our first on-line mini course on Earth Day, April 22nd. Our first course is entitled, How You Can Help The Monarch Butterfly. Specifically, the course teaches and encourages you to grow more milkweed and how to raise eggs to adult Monarchs! To register, click HERE!

The Joslin Garden—Getting Edgy and Mucky on March 25, 2021

Something clicked today; I can’t put a finger on it, but I think it was a combination of the beauty of the garden on this fine spring day, the anticipation of Earth Day, Thursday, April 22nd, and the upcoming plant sale. I need to start working on the plant list, but we will have lots of garden goodies. In any case, yesterday wore me out, err, excited me to press on. Nell and I are calling next week’s work session, “all hands on deck” to spread our newly discovered compost to cover the beds we are slowly weeding. After that, we can return to normal improvements. But first, there is still more work to be done in the compost piles. More on both later.

Eye candy

Eye candy

NELL GETS EDGY

Nell Joslin, clearing out dwarf mondo, Ophiopogon japonicus ' Nana', and adding snowflakes, Leucojum spp., then topping with compost.

Nell Joslin, clearing out dwarf mondo, Ophiopogon japonicus ' Nana', and adding snowflakes, Leucojum spp., then topping with compost.

Nell suspected there was more driveway than meets the eye! She was right! We found the edge a couple of feet inward.  In the next week or two, we will move the soil back up the hill.

Nell suspected there was more driveway than meets the eye! She was right! We found the edge a couple of feet inward. In the next week or two, we will move the soil back up the hill.

Nell Joslin added a line of dwarf mondo ‘Nana’ along the path. It is our hope we will end up with an entire lawn of ‘Nana’.

Nell Joslin added a line of dwarf mondo ‘Nana’ along the path. It is our hope we will end up with an entire lawn of ‘Nana’.

Ophiopogon japonicus ‘Nana’ Nell Joslin dug up from other areas of the garden to use as edging. Our goal is to replace the lawn with this verdant beauty.

Ophiopogon japonicus ‘Nana’ Nell Joslin dug up from other areas of the garden to use as edging. Our goal is to replace the lawn with this verdant beauty.

Nell and I discussed adding the dwarf mondo, Ophiopogon japonicus ' Nana' dug from where Volunteer Beth was working, but then we realized there is a weed barrier down. Please note how well the barrier is NOT affective. I’m not a fan AT ALL of weed b…

Nell and I discussed adding the dwarf mondo, Ophiopogon japonicus ' Nana' dug from where Volunteer Beth was working, but then we realized there is a weed barrier down. Please note how well the barrier is NOT affective. I’m not a fan AT ALL of weed barriers. Because of the barrier, we decided just to put down cardboard and cover with mulch. Maybe someday we can improve this area, but at least after next week it will not be an eye sore.

I gave Volunteer Art an assist in dealing with the metal edge. At this curve, the edging was up about an inch, holding back water. We agreed it needed to be fixed. First Art tried raising it, but it was proving difficult. Then we tried hammering it …

I gave Volunteer Art an assist in dealing with the metal edge. At this curve, the edging was up about an inch, holding back water. We agreed it needed to be fixed. First Art tried raising it, but it was proving difficult. Then we tried hammering it to sink. That got us nowhere. So with sheer determination, Art and Helen said, “we got this.” And in deed we did. Team work is always a good idea! If you look closely, you can see my knee prints in the muck on the front side of Art. Haha.

HELEN GETS MUCKY

Where to start? Things got a bit mucky in the garden. For anyone who has ever seen me garden, I do so at ground level. Crazy right?

I started with weeding the four quadrant Formal Garden. I thought I was going to knock out this project in a day, but I was oh, so wrong. I only weeded one quadrant, revealed its existing path, and mulched half of it. So what was the hold up? Read on.

Quadrant 1 in the Formal Garden before weeeding

Quadrant 1 in the Formal Garden before weeeding

Before weeding Quadrant 1.jpg
Ok, here I am after moving and laying compost from Compost Bin 1.

Ok, here I am after moving and laying compost from Compost Bin 1.

So what was the slowdown? The compost bin. There are still a LOT of sticks mingling in with our black gold. Next week, my first priority will be to clear out the bin completely of sticks, so when we do start seriously laying compost, there will be no obstacles. Another mucky job, but it will save us time in the long run.

In the meantime, Volunteer Ailene began to tackle the winter jasmine, Jasminum nudiflorum, as we discussed last week. Ailene was off on her own working; I regret to say I almost forgot she was there! That is how independent our volunteers are!

Sadly, I didn’t get a picture, but man ole man, she was hard at work. To get this jasmine where we want it, it will take a few more weeks. In the mean time, we have babies to share at the plant sale.

Volunteer Beth was at it tackling another tough job. We had an area at the entrance, against the short retaining wall that was ALL dwarf mondo, Ophiopogon japonicus, the odd snowflake, Leucojum spp. and a sprinkling of daffs.

We decided to make that area a four-season bed. Beth dug out all the mondo, except along the edge, which we wanted to keep, and added several coneflowers, Echinacea purpurea ‘Cheyenne Sprit’, but likely crossed with the straight species. We were fortune to get plants from the City of Raleigh Parks greenhouse, as well as potting soil to pot-up starts for sale plants. We can soon do this b/c we will be part of District 4.

Volunteer Helen. I clean up nice, don’t you think? This photo was taken by Jeremy Schmidt with my second book, Plants with Benefits, was featured in the NYT.

Volunteer Helen. I clean up nice, don’t you think? This photo was taken by Jeremy Schmidt with my second book, Plants with Benefits, was featured in the NYT.

Volunteer Helen, yes, that’s me, again, added volunteer hours. I bet you didn’t know that. I put in volunteer hours each week, as well. Typically house hours putting this post together. So yes, this post has been brought to you by Volunteer Helen. I hope you enjoyed it. If so, please give us a LIKE.

Until soon,

Helen Yoest, Horticultural Specialist

Environmental Scientist, M.S.

The Joslin Garden—Pruning, Plucking, and Preening-March 18, 2021


Nell Joslin hauling freshly mined compost

Nell Joslin hauling freshly mined compost

Dark again at 7:00 AM. The misty morning felt like we were in the Cotswold, England. Once the light shone in the garden, a light fog covered the trees tops, and we felt like we were in Asheville, NC . But it was better than both combined; we were in The Joslin Garden! A City treasure that must be experienced.

It was a good day at The Joslin Garden. With expected storms to arrive in the mid-afternoon, we weren’t sure if we would get in a full day. We did. The weather cooperated with us. I’ll have to amend this post later to see what damage the storms may have caused.

In anticipation of Neal’s team NOT being free Friday (they may be too busy helping the City of Raleigh overall), we made sure we took all the biowaste was taken to the side of the street property— knowing it may need to wait a week.

P.S. The storms pass our area of Raleigh.

And on another bit of GREAT news, Nell and I are fully vaccinated, as is Volunteer Art; so we were totally mask-free. The City allows us to work mask-free in open park spaces and being sure to don a mast when visitors walk by. Because of the misty weather, we were able to put our faces into the mist. It felt good.

PRUNING

It seems like it is Chindo week for me. I pruned rows of them at Mordecai, Chindo viburnum, Viburnum awabuki 'Chindo' earlier during the week. These babies can really get out of hand, and yes, this one was planted too close to the path and house. They are really too big for most locations. But here we have one, so we will manage it.

In pruning Chindos, it’s best to NOT shear it. It’s best to identify “water sprouts”, those shoots that come right up from the bottom. We had to take a lot out, and there were some “holes” that are not desirable, but they will fill in. Chindos grow fast!

I’ve misplaced the before picture, but to give you an idea of how high the Chindos grew, I pruned out several stems that were 12 higher than the tallest stems!

Helen Yoest after pruning the Chindo..

Helen Yoest after pruning the Chindo..

PLUCKING

We are STILL plucking Bearclaw hellebores, Helleborus foetidus! Can you believe this? I can and so can Volunteer Art. I forgot to get a pic of Art, but trust me when I say he dragged two tarps full to the street. I’ve even lost count of the number of BAGs we have filled, let alone the actual number of plants. No doubt, they were in the thousands by now, and still not done!.

As the plucking continued, we have a couple of winter flowering Jasmine that are basically leaf catchers. Winter Jasmine, Jasminum nudiflorum, is a popular plant to fall over a retaining wall or slope, easy to grow, and sometimes flowers as early as November and often in December and January, and then right through March. This year, they are just beginning to bloom!

I took on an easy one to pluck out the leaves, because I wanted to save the larger one for Volunteer Ailene. She likes defined projects. This will keep her busy next Thursday. ;)

Winter jasmine before. See what I mean? A leaf catcher!

Winter jasmine before. See what I mean? A leaf catcher!

It looks so much better…at least me me <3

It looks so much better…at least me me <3

Winter flowering Jasmine can get a bit messy so that the stems are a tangle, as shown in the image below. To overcome its untidy habit, pruning will help to keep it in shape. This variety of Jasmine is always pruned in the spring immediately after flowering. But when there is a problem, there is no need to wait, or at least that has been my long-held view. We will not necessarily be pruning it, but plucking out years or even decades of growth where it has spread.

The real hunk was left for next week. Volunteer Ailene and I talked about this mess below last week. I think I have a plan to tackle it. I’m sure (I hope) she is still on board with taming the monster.

Winter Jassmine.jpg

This winter form of Jasmine always flowers yellow, Latin name is Jasminum nudiflorum means naked flowers. The latin name is describing the flowers on bare branches ahead of the foliage.

Although commonly described as a climbing plant, it has no tendrils and is not very self supporting; it is more of shrubby scrambler than a climber. It has long arching branches which will arch upwards and over a fence or wall and can be trained  or tied to cover a structure.  Jasmine growing vertically up a wall or fence will need to be tied in to train the growth. 

PREENING

There are a lot more to Camellia japonicas than just a pretty face. We are in the spent-camellia-blossoms-mode. It’s important to rake up spent blooms from the ground. Did you know that?

CAMELLIAS: There are two types of camellias commonly used in eastern North Carolina. The Japanese camellia, C. japonica, is a large plant that gets 15 to 20 feet tall and six to ten feet wide. Japanese camellias have large leaves and flowers that are 4 to 8 inches in diameter. Blooms may open from early winter to spring.

Sasanqua camellias, C. sasanqua, have smaller leaves on a plant that is normally six to ten feet high and about three to five feet wide (there are some dwarf types too). Flowers are only two to three inches in diameter and open in the fall or early winter.

Both types come with flower colors of pink, red, and white, and form a broad, densely branched evergreen pyramid.

Camellias like acidic (pH 5 to 6.5), well-drained soils. It is best to plant them on the north side of a house or in semi-shade, and in The Joslin Garden, under the cover of hardwoods and pines.. Container plants can be planted at any time of the year. Spacing of camellias is important as it is with all plants. Based on their size, research has shown that sasanqua camellias should be planted at least 4 feet from a wall to allow access for maintenance and good air circulation.

If camellias are to be used in a hedge, plant them five to six feet on center. To keep sasanqua camellias individually, plant at least eight feet on center. Plant camellias six to eight feet from a wall, eight feet on center for a hedge, and at least 12 feet on center to keep plants individual.

Nell Joslin cleaning up spent blooms to help control the spread of diseases.

Nell Joslin cleaning up spent blooms to help control the spread of diseases.

Groom: Tidy camellia blooms. Spent camellia blooms, particularly with C. japonicas, are susceptible to petal blight. Remove fallen blooms — and those ready to fall — to prevent the spread of disease and insect problems.

If you suspect your faded flowers have blight, don’t put them in the compost pile. Instead, place them in a plastic bag and dispose of it in the trash.

Currently, many of The Joslin Garden camellias have tea scale. Nell has arranged for Leaf and Limb to treat those camellias. It is out hope that good housekeeping will also keep the scale at bay. But it may be wishful thinking. At least, I know we won’t get blight.

Pruning camellias should be done following flowering; prune each type of camellia accordingly, if at all. In The Joslin Garden, no pruning is needed.

IN THE MEANTIME…

After pruning, plucking, and preening, I weeded The Rose Garden again. I’ve been waiting to mulch The Rose Garden bed since I directed sowed bread poppies about three weeks ago. I was waiting form them to germinate. To today was my day to tidy up the bed. The bed was filled with harry bittercress. Yikes. I did my best.

The Rose Garden before weeding and mulching!

The Rose Garden before weeding and mulching!

IMG-2758.jpg

Stay tuned for next week where Nell gets edgy and I get mucky!

I’m already looking forward to next week. I want to leave you with one last thought. Garden maintenance isn’t a chore. While working in the garden, be sure to stop and admire all that is around you. I took a rest cleaning up camellias, and before I started back, I found this image below. I stoped and gave wonder. The perfectly shaped heart told me Bill and Mary are looking down and are pleased with our efforts.

Camellia heart petal.jpg

Until soon,

Helen Yoest

Horticultural Specialist

Environmental Scientist, M.S.


The Joslin Garden—Volunteers (and donors) are The Backbone of our Non-Profit—March 9, 2021

Nell Joslin and I do our best, and with 4+ acres, you can imagine, we welcome volunteers. Recently, Art and Ailene, The ‘A’-team, helped us in the garden with two different goal-center tasks. They made such a difference! Then Beth joined us. She too is part of the ‘A’ team…there are no “B” workers ever. Volunteers get an automatic A.

If you have time, we’d love to have you volunteer with us at The Joslin Garden. If interested, please sign up HERE! We can work with any skill level, and I promise you will learn something during each visit. We love sharing plant information and tales.

Art tackled ridding the Bear-claw, Helleborus foetidus. There is still plenty more if you want to join us next Thursday. As it happens, Beth is able to use them for another volunteer projects she is involved with.

Art.jpg

Volunteer Art giving The Joslin Garden a helping hand.

Volunteer Aliene spreading dwarf mondo grass..

Volunteer Aliene spreading dwarf mondo grass..

Since I first started working in The Joslin Garden on January 7, 2021, I wanted to move part of a patch of dwarf mondo grass, Ophiopogon japonicus from one side of the path to fill in the opposite side. Ailene made it happen! Looks good, right? Ailene said it was like digging in concrete, the clay was so bad there. But Ailene got it and now were can focus on other tasks.

A job well-done by Volunteer Ailene!

A job well-done by Volunteer Ailene!

Nell Joslin, always ready to pitch in, turned compost Bin 1, the one we cleared first, and discovered what was underneath last week. Turning it will help to break down the organic matter quicker, and we wanted to see what we’d be working with.

We plan to spread a good bit of this compost in Bin 1 into the veggie garden, the entrance beds to the main garden, and the rose garden. I did self-sowed bread poppies, Papaver somniferum, in the rose garden so I want to wait until they are clearly visible. Did you know poppies need sunlight to germinate?

Once we see some size to our poppies, we will then cover the bed with compost. This is black gold. In other words, good stuff! Chris, our Executive Director starter moving over compost today!

Volunteer Nell turning Bin 1 Compost pile!

Volunteer Nell turning Bin 1 Compost pile!

Compost Bin 2 has had a clearing start.

Cleaning out Compost Bin 2.

Cleaning out Compost Bin 2.

Compost Bin 2 cleared out…I think. there is more digging to do, but I got out a lot of big stuff!

Compost Bin 2 cleared out…I think. there is more digging to do, but I got out a lot of big stuff!

What NOT to put in the compost pile. Bin 2 was filled with debris like this.

What NOT to put in the compost pile. Bin 2 was filled with debris like this.

What a haul we do each week!!!

What a haul we do each week!!!

There were two Ilex x 'Nellie R. Stevens' at each end of the front of the house. Or at least there were. ‘Nellie R. Stevens’ always seems to be in a state of needed something cut, and they are fast growers. About a month ago, I sawed down the one closest to the front door. Today, Volunteer Beth, took down the other. Her remark was, “That was very satisfying!” I know the feeling. Nothing feels better than the feeling of accomplishment!

No doubt they will sprout back, and when they do, we plan to manage the size.

Removing this other holly was on our list. Volunteer Beth mades short work of this!

Removing this other holly was on our list. Volunteer Beth mades short work of this!

Volunteer Beth making short work of removing the holly.

Volunteer Beth making short work of removing the holly.

Volunteer Beth next took on the Carolina jessamine, Gelsemium sempervirens tangled up in the tree. Even though I like vines trellising trees, it was clear the intent of this vine, it was meant to vine along the fence.

This Carolina jessamine, Gelsemium sempervirens, was trellising the tree. Volunteer Beth untangled it and draped it around the fence. I had a great picture of her as she finished, but I accidentally erased it. Bummer! I’ll get another!

This Carolina jessamine, Gelsemium sempervirens, was trellising the tree. Volunteer Beth untangled it and draped it around the fence. I had a great picture of her as she finished, but I accidentally erased it. Bummer! I’ll get another!

Volunteer Beth with her finished product! .jpg

Too many sticks are throughout. While the volunteers were busy at work, I picked up sticks!

“Oh look!”, I exclaimed, There is a fire. Perhaps these sticks can go in there!

Screen Shot 2021-03-11 at 6.37.25 PM.png

With just enough time during my day, I managed to plant Japanese roof iris, Iris tectorum from Nell’s home garden, and Iris japonica ‘Eco Easter’ from my friend Abby’s garden. Abby shared some with me too!

The Raleigh Parks gardeners, Drew and Lauren, stopped by since they worked with their own volunteer group at the Park across the street. These gals were from the Raleigh Garden Club. After they toured the property, the comments were glowing, but I realized that I’d not ventured much beyond areas around the house since January. So what did I do? I identified a task that would allow me to do a walk-around. With a wheelbarrow, I walked; I admired all the early bloomers and picked up sticks.

Oh, and by the way, I walked across the street to cut back the ivy on my break time. I’ve done five trees so far. Little by little, I will have the ivy cut. It is another satisfying task.

There are around 60 camellias on the property, and it seemed like all were in bloom. Please visit. We work just like a park. Just come and enjoy. We are open from 9 to 5. Here are some of the blooms I found along the way:

Prettiest Pink Camellia Never, or at least I think so!

Prettiest Pink Camellia Never, or at least I think so!

Camellia japonica still waiting to be identified.

Camellia japonica still waiting to be identified.

Daffs.jpg

Thanks for visiting.

Until, soon!

Helen Yoest

Horticiulist Specialist

Environmental Scientist M.S.

IN THE WILDFLOWER CIRCLE—Three Bulbs to Know and Grow & Bulb Types—The Joslin Garden, March 4, 2021

The Joslin Garden Wildflower Circle

The Joslin Garden Wildflower Circle

There is a planting bed Mary Coker Joslin called the Wildflower Circle in the driveway circle center. Indeed, the circle bed is packed with the littlest bulbs to the showiest wildflowers. As the season progresses, we will learn more about what’s flowering in the Wildflower Circle, but for today, let’s MARCH FOURTH and learn about three bulbs making a show of it today!

Not all “bulbs” are the same. There are five bulb types falling under that title: true bulbs, corms, tubers, rhizomes, and tuberous roots. It’s a good idea to understand differences, but it’s also OK to call them all bulbs. Or at least I think so.  


True bulbs contain a fully formed plant. Daffodils, tulips, lilies, grape hyacinths, and amaryllis are all true bulbs. If you slice open a daffodil vertically, you will find the entire embryonic daffodil—flower, stem, leaves, and roots—ready to spring forth once the time is right.

Corms are similar to true bulbs in that they contain a stem base, but they do not hold the entire embryo plant. The roots growing from a basal plate are located on the bottom of the corm. (The basal plate is the base area of the bulb.) The growth point is located on the top of the corm. A corm only lasts for a single season, but a new corm will form on top of the old. Plus, “cormels” are also produced, forming around the corm’s basal plate base. Popular corms include gladiolus and crocus.  

Tubers have an underground stem base with no basal plate. The tuber's roots grow from both the base and from the sides, with multiple growth points spread out over the tuber’s surface. Classic examples are anemone and caladiums. 

A rhizome is a thickened stem that grows either partly or completely underground. If you immediately thought of a bearded iris, you are correct. On a rhizome, the largest growth point is located at one end, with additional growth points located along the sides. Most of us can clearly identify these bulbs as rhizomes. 

Tuberous roots are the fifth and final type of bulb. Most often, tuberous roots are not thought of as bulbs at all (at least, not by me), but they are. Their parts below the ground are unmistakable. Unlike other bulb types, those tuberous roots have puffy root-like structures that look as though someone pumped them up like a balloon, but they are really adapted stems—not a true root. Instead, the actual root grows from the sides and the tip of the tuberous root. Familiar tuberous root plants include dahlias and daylilies.

If you want to read a charming book by Elizabeth Lawrence, check out her 1950s title called: The Little Bulbs, A Tale of Two Gardens. Of course, we aim to charm, too, so please read on!

When styling your garden at home, there is no reason not to have bulbs blooming during every month of the year. The variety is astounding. I had so many summer-blooming bulbs, but I never actually thought of them as bulbs. In the end, I don’t suppose it mattered, as long as I enjoyed watching the hummingbird sipping nectar from cannas, wondered at the twisting red and yellow petals of the glory lily (Gloriosa superba), or admired the crocosmia lying across the gravel path. 

THE WILDFLOWER CIRCLE

GALANTHUS spp., Snowdrops

Snowdrop, Galanthus spp. are herbaceous plants of the Amaryllis family, a genus of perennial grasses. In nature, there are about 20 species, most native to the Caucasus and Asia.

Biologists cannot say for sure how many Galanthus species since are several opinions on this matter. However, they all believe that the number of plant varieties exceeds 18. Many types of snowdrops are very similar to each other, and most are approximately the same size.

Did you know all plants receive their names—genus, specific epithet, cultivar—either from the place found or in honor of the people who discovered and researched them. Often, as we will see with G. Nivalis, the genus and species we named from a Greek (genus) and Latin (species) word.

Within the Wildflower Circle, I’ve found (so far) two species of GalanthusG. nivalis and G. elwesi.

Snowdrops are a true harbinger of spring, or should I say winter, since they typically bloom from January to mid-March? Forming an impressive blanket of white in areas where they’re native or have naturalized, like in The Joslin Garden.

GALANTHUS NIVALIS

Galanthus nivalis

Galanthus nivalis, considered the common snowdrop, is the best-known and most widespread of the 18 or more species in its genus, Galanthus

Galanthus nivalis earned its name from the combination of two words, one Greek and the other Latin. Galanthus, from the ancient Greek word, means “milk-white flower,” while the Latin word nivalis means resembling snow.

Easily grown in average, medium moisture, well-drained soils in full sun to part shade. Prefers moist, humusy soils in part shade. Grows particularly well under deciduous trees where exposure to the sun is full in early spring, but gradually changes to part shade as the trees leaf out.

GALANTHUS ELWESI

Galanthus elwesi, Large snowdrops

Galanthus elwesi, Large snowdrops

Galanthus elwesi is commonly referred to as the large or giant snowdrop. G. elwesi has larger flowers, leaves, and size than the similar common snowdrop, G. nivalis. Each flower has six tepals—three spreading outer tepals and three shorter inner tepals.

These large snowdrops favor the same growing conditions as G. nivalis.

Specific epithet honors Henry John Elwes (1846-1922), an English entomologist, botanist, and naturalist who is believed to have introduced the plant into cultivation. Species plants are native to mountain areas of western Turkey.

CYCLAMEN COUM

The Joslin Garden has an existing, albeit out of date, a database of plants. There are three Cyclamen spp. listed—Cyclamen coum, C. hederifolium, and C. var album. So far, I’ve identified two, one in bloom, and the other waiting to emerge. Again, special thanks to Tim Alderton, at the JC Raulston Arboretum for identifying the two found so far.

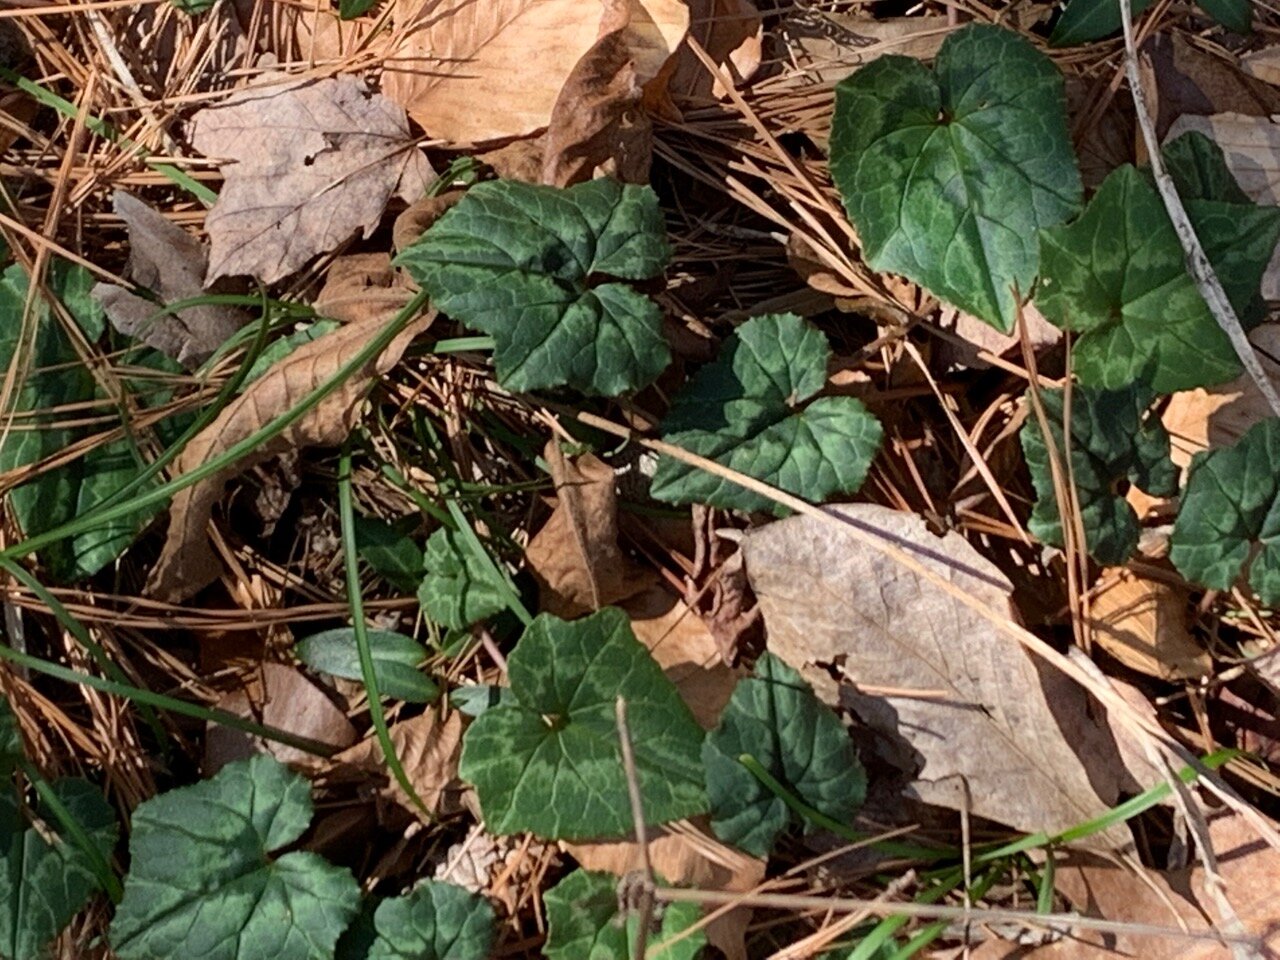
These guys are so similar I couldn’t tell the difference, until Tim’s identification. To tell the difference, look to the flowers. Cyclamen coum flowers are dumpy and have no auricles at the base. The flowers of C. hederifolium are more elongated and have auricles. The leaves are also different, and for now, since C. hederifolium isn’t in bloom at this time, you can also look to the foliage. C. coum has rounded leaves, and C. hederifolium is more pointed. And of course, you can just enjoy the bloom and now worry at all about identifying the various ones.

Cyclamen coum

Cyclamen coum

CYCLAMEN HEDERIFOLIUM

Cyclamen hederifolium

Cyclamen hederifolium

CROCUS

The Joslin Garden plant list for 2007 indicates two croci (plural for crocus), a blue form, and a yellow form. The cultivar isn’t listed. Both are blooming now.

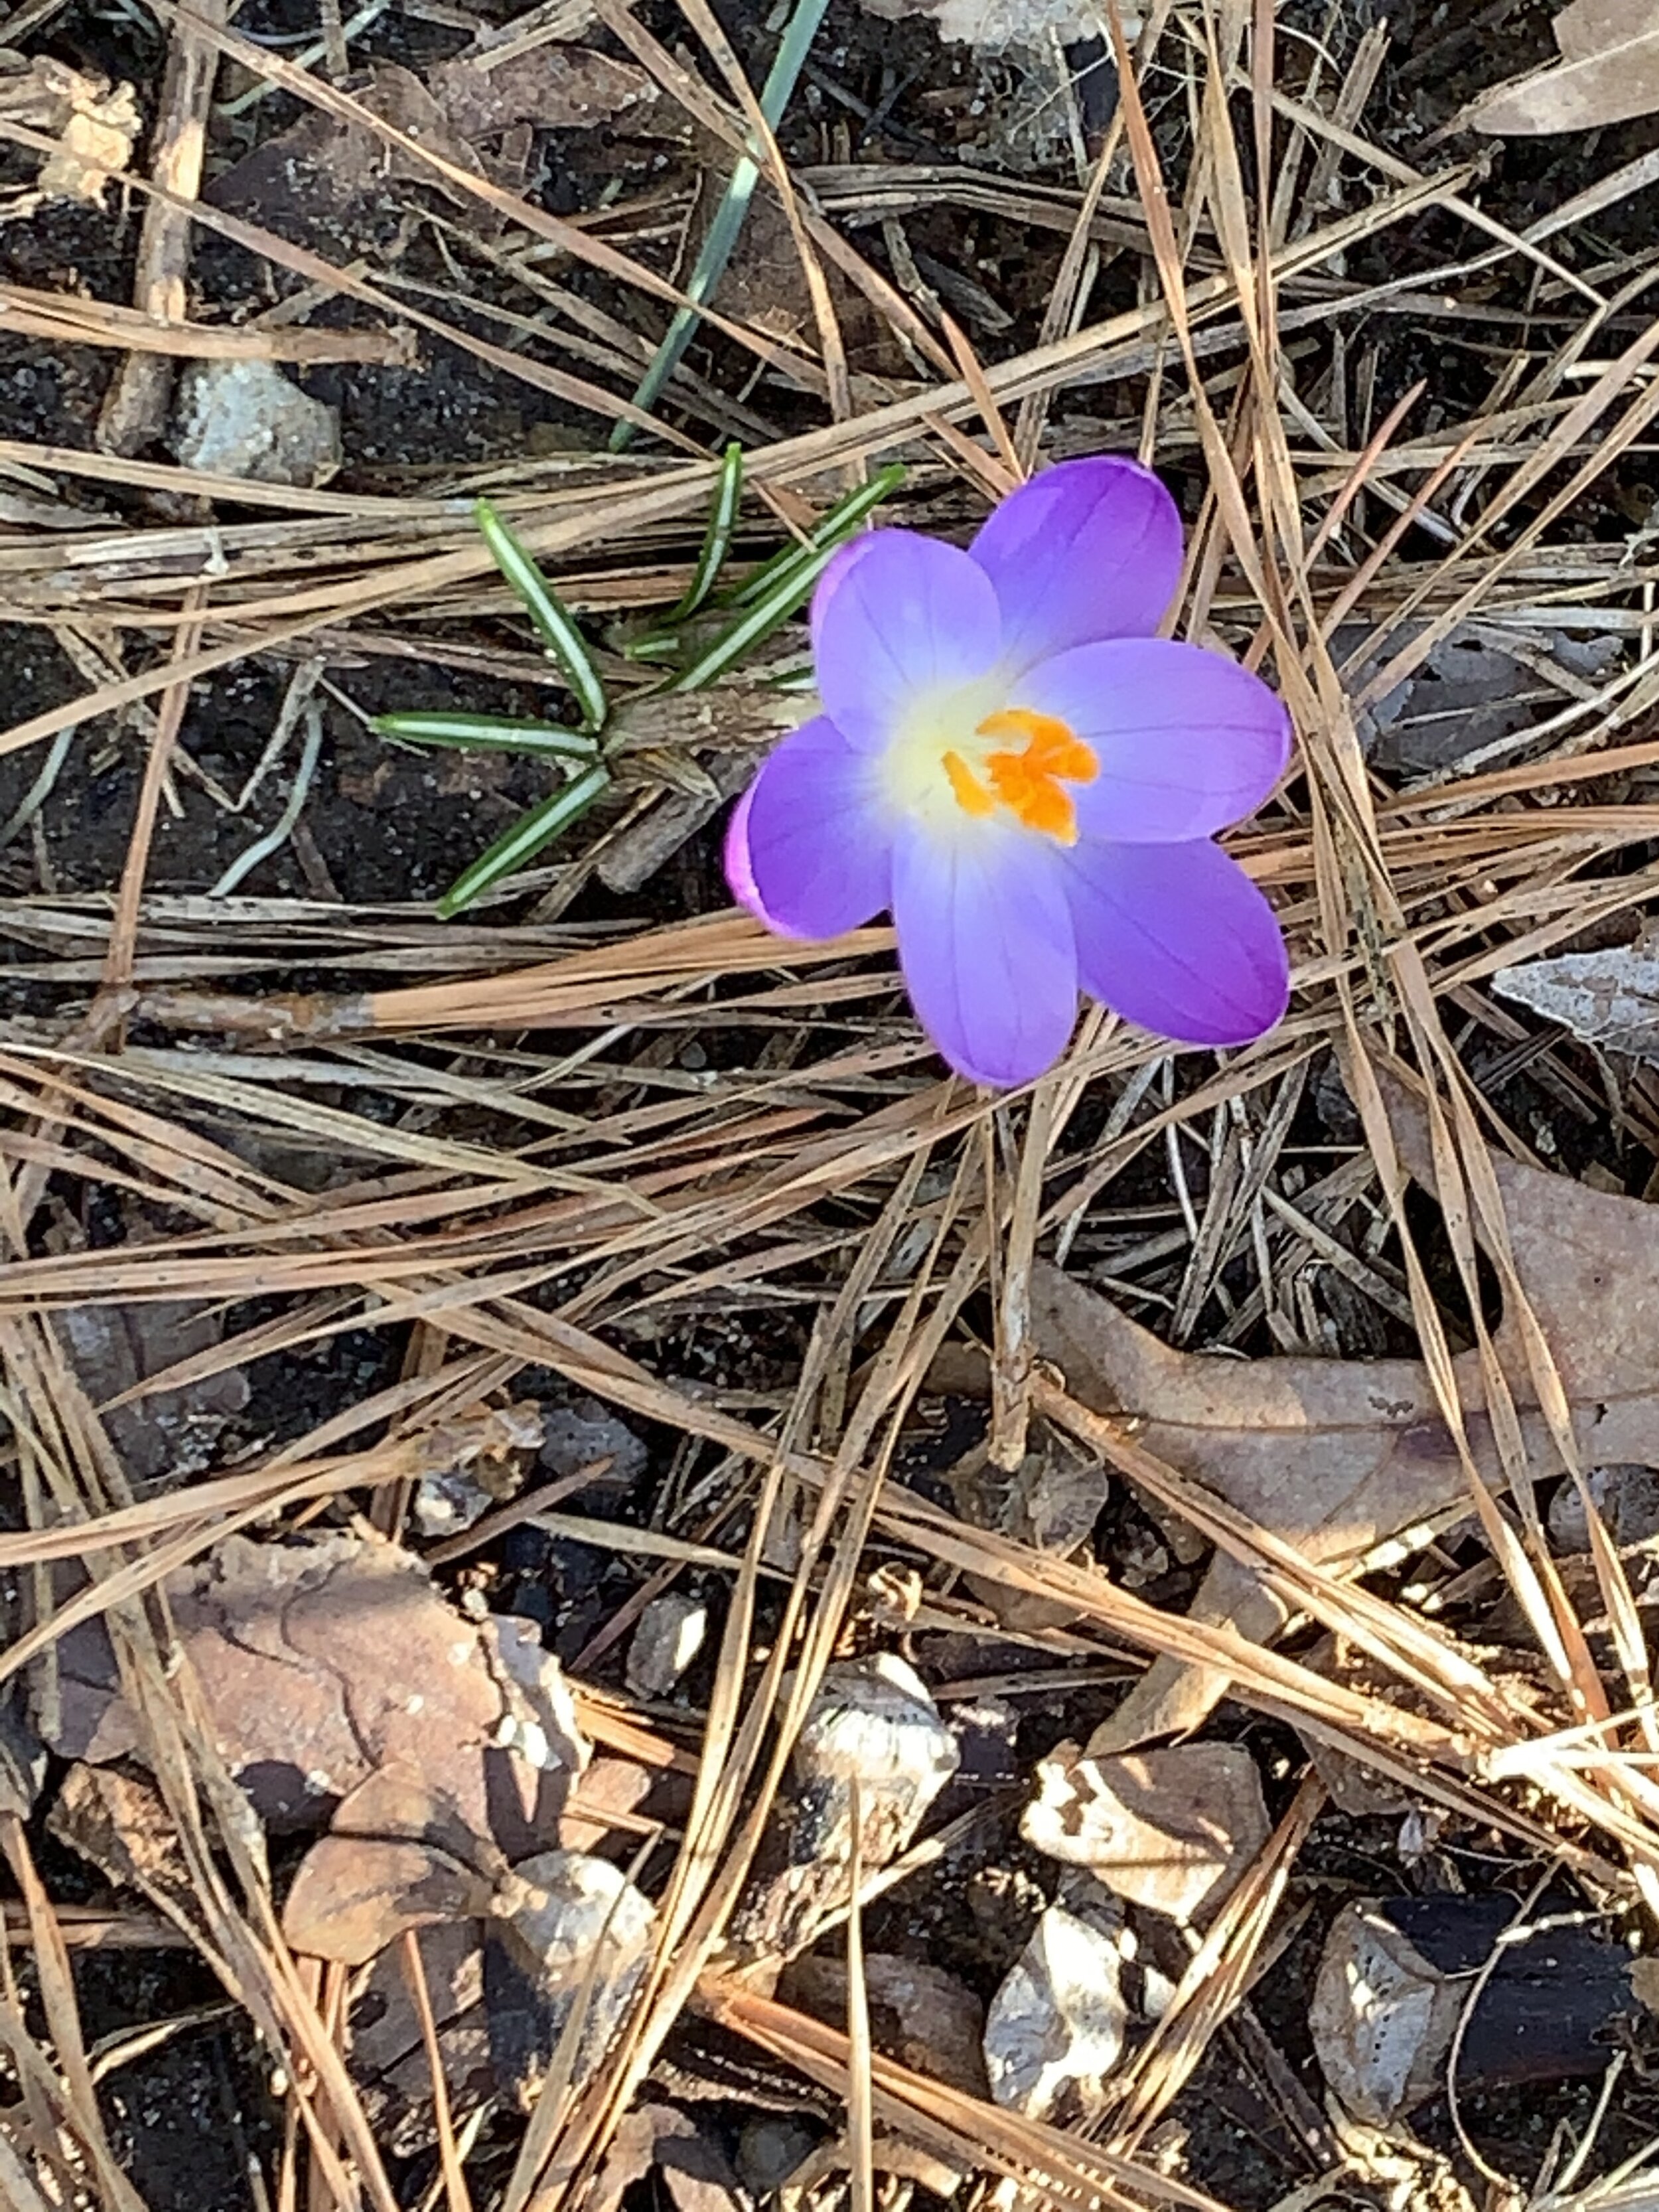
This crocus is identified as a purple form in the 2007 database. I can name this one, it is Crocus tommasinianus or affectionally know as the Tommies

This crocus is identified as a purple form in the 2007 database. I can name this one, it is Crocus tommasinianus or affectionally know as the Tommies

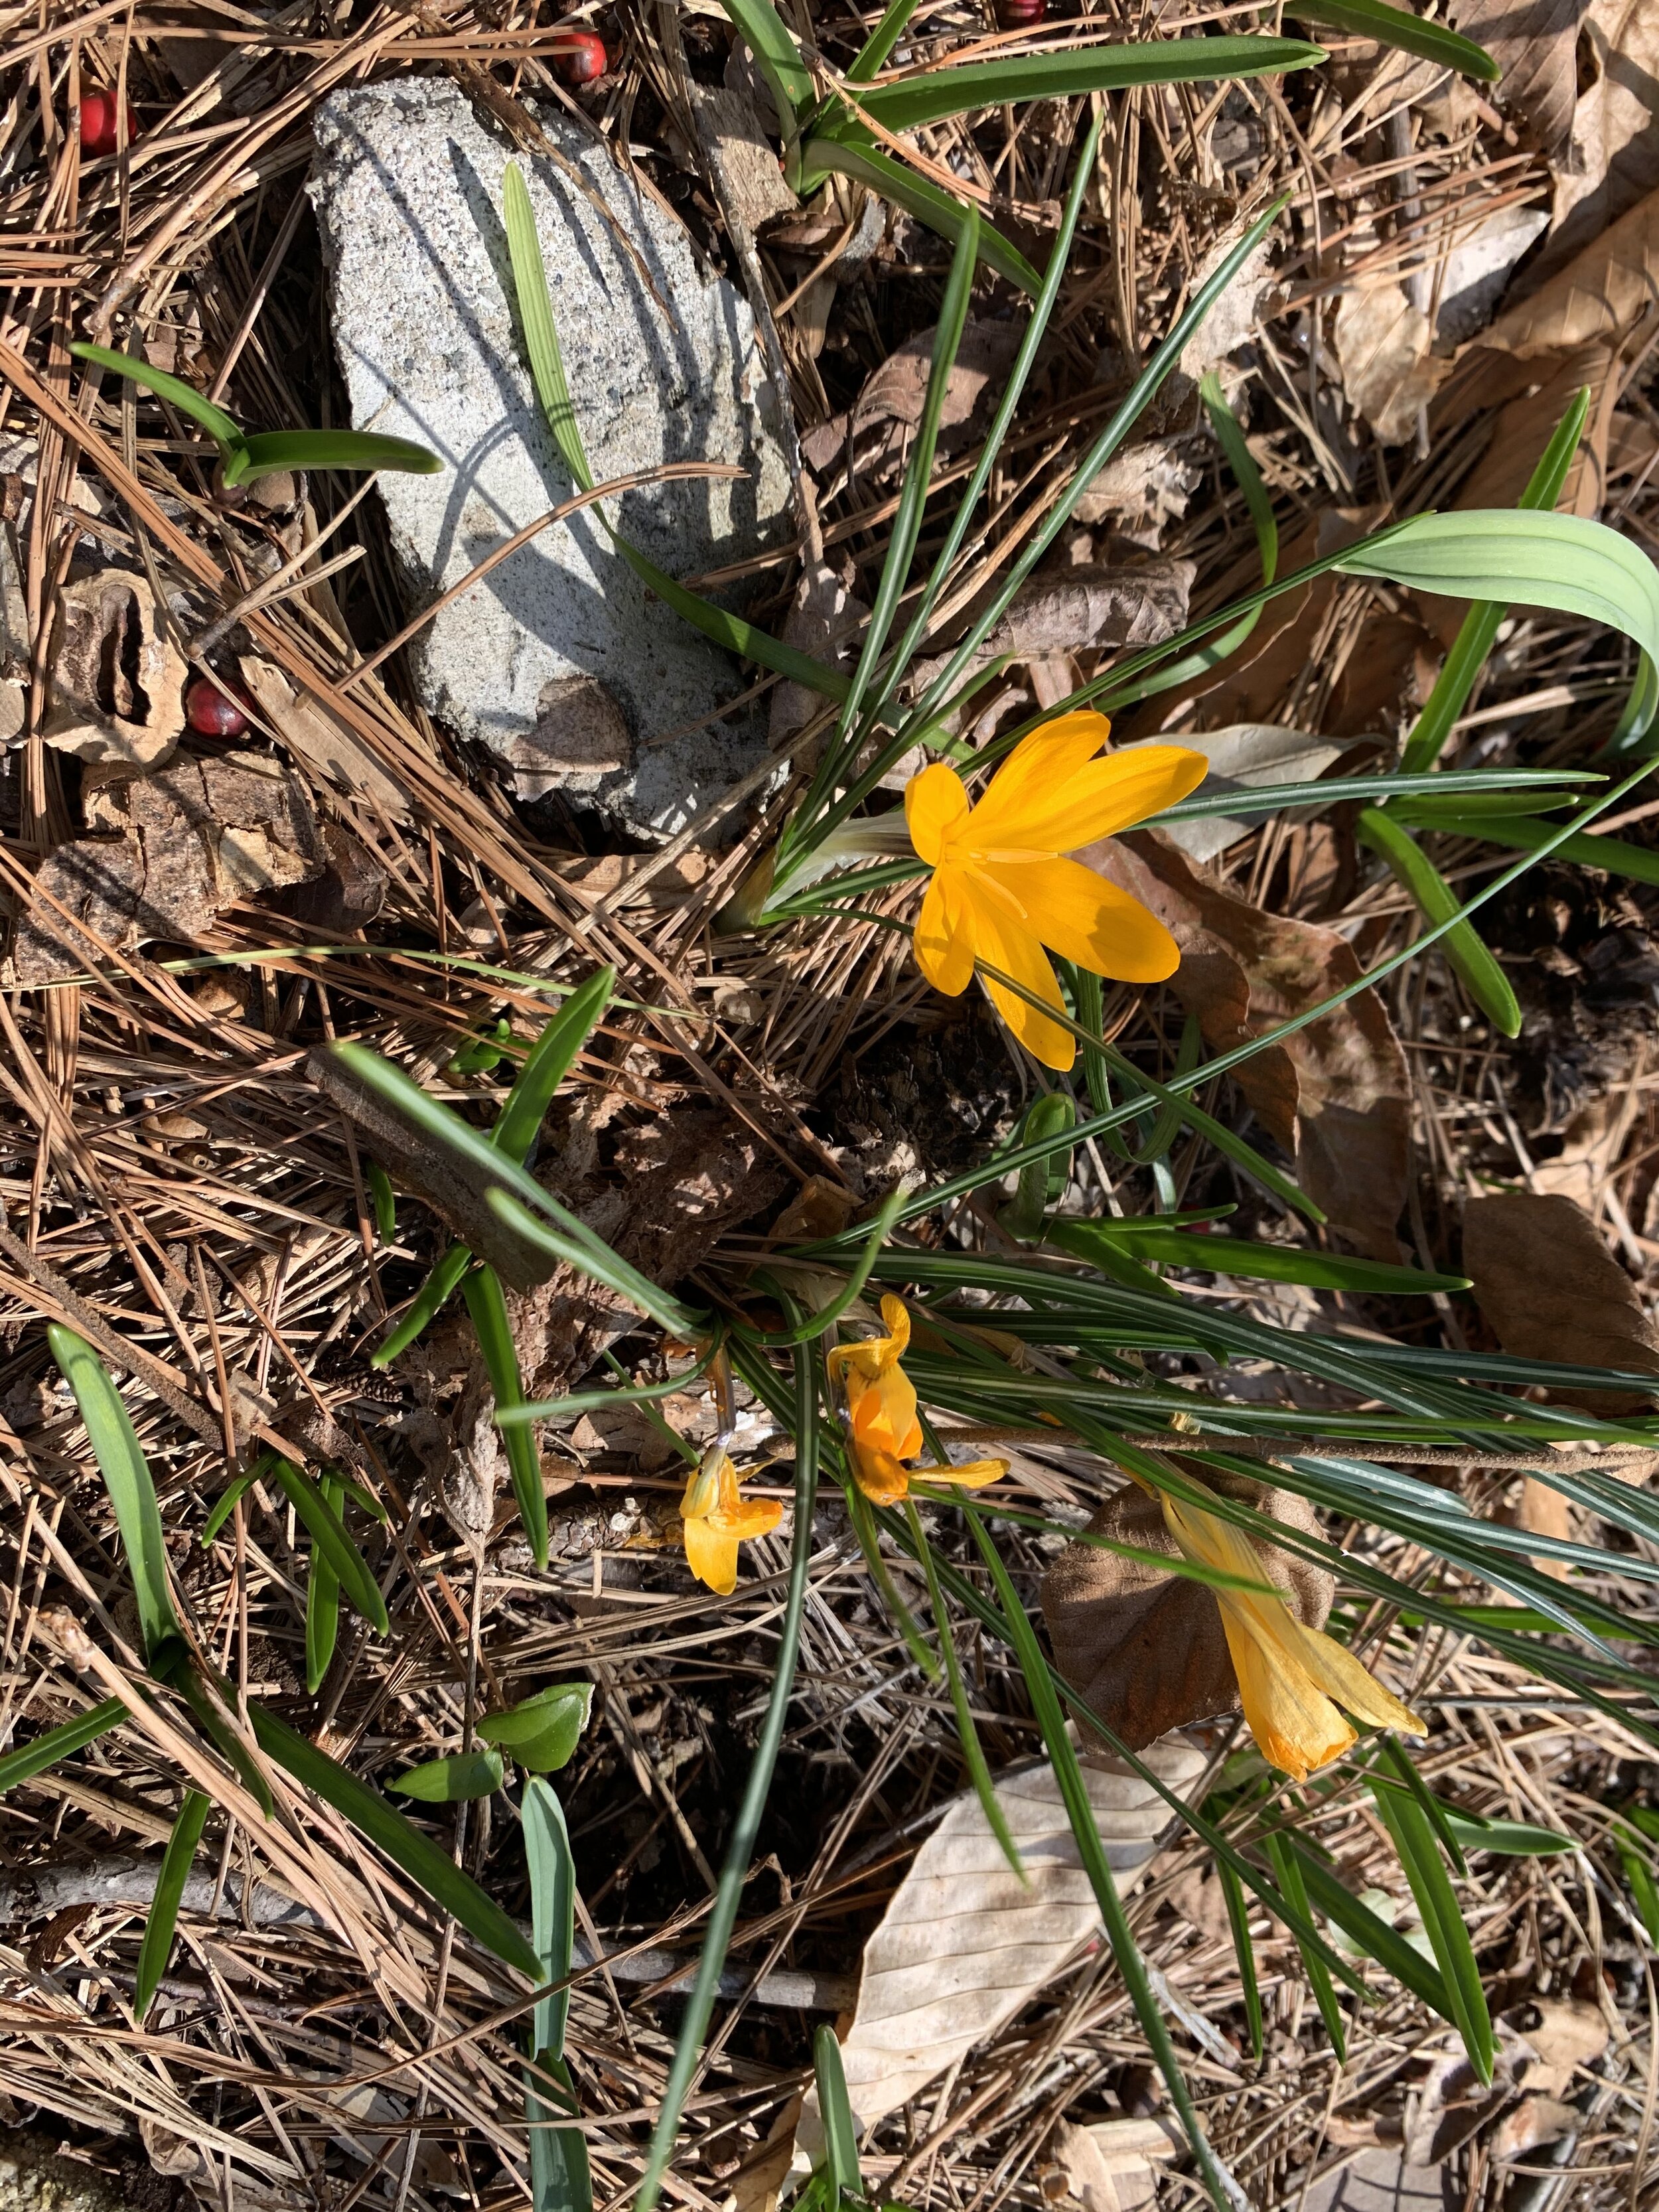
Yellow form crocus.

Yellow form crocus.

Gardeners often confuse crocus with colchicum. I tend to think of crocus as a spring-blooming bulb and colchicum blooming in the fall. Except for Crocus satvius, also known as the saffron crocus blooming in the fall.

Telling the difference between crocus and colchicum is easy once you know two main traits to look for.

One. Flowers: Colchicum flowers have six stamen (male flower part), while croci have only three.

Two. Foliage:  Spring-blooming crocus varieties flower at the same time foliage emerges. So if you see foliage AND flowers, it is one of the spring crocus varieties, not so with Colchicum. spp. With colchicum, the flowers bloom without foliage, which comes later. Some refer to as nakked ladies. (I wonder what Mary Coker Joslin thought about that? I know it makes me blush.) Colchicum leaves appear in spring and is large and floppy, then the flower follows in the fall.

Thanks for following us along on The Joslin Garden journey!

Until soon,

Helen Yoest

Horticulturist Specialist

Environmental Scientist, M.S.


The Joslin Garden—Ivy and Compost!—2-25-20

Thank you for following us on our journey to prepare The Joslin Garden for the 2021 season! We began our tasks on January 7th, and it is a process of putting one foot forward. There is a lot to do, and we hope to bring the Garden into full health while also enhancing the visitor’s experience by April. Even then, we won’t be near the point where daily maintenance will be all that is needed. It may take a year to reach that goal, but we are getting there, one Thursday at a time. We hope to have more than one day a week in the coming months.

ENGLISH IVY

Full disclosure, The Joslin Garden has a lot of English ivy, Hedera helix, The ivy is primarily at the street and driveway entrance, and was intentionally planted for erosion control of the steep slope. Over time, the ivy crept further back into the wooded area, so one of our tasks today was to cut it back to the crest of the slope. 

Before—taking ivy back to the crest of the hill. It was encroaching into forest bed

Before—taking ivy back to the crest of the hill. It was encroaching into forest bed

We also removed English ivy across street where the English ivy is climbing up the trees in the city park area. Nell Joslin has done this in the past, but we will keep it on our radar since it affects not only The City of Oaks Foundation’s garden but also the surrounding home gardens. 

Pulling the ivy to the crest of the slope.

Pulling the ivy to the crest of the slope.

Did you know English ivy will only bloom, berry, and invade if it’s allowed to climb? Former caregivers of The Joslin Garden have been diligent to keep English ivy from vining up trees. So we don’t have babies everywhere, but there are still some, most likely sown by birds from neighboring properties, including the easement across the street.

During the deep ivy dig and cut along the crest, we uncovered a row of sweetbox, Sarcococca spp. They are spread further apart than I would have done if I wanted an impact, and the plants are very small. But given that they do seem to follow the ivy line, they must have been intentionally planted. The ivy was keeping the sweetbox from thriving!

Sweetbox.jpg

COMPOSTING

Somewhere along the Garden’s journey, the compost piles were neglected. There is “black gold’ under the latest uncomfortable additions .

Neglected compost pile

Neglected compost pile

After Nell and I removed the sticks, we found more black gold compost that we thought was there. It is already usable. Next week we’ll add some of it to the veggie garden.

After Nell and I removed the sticks, we found more black gold compost that we thought was there. It is already usable. Next week we’ll add some of it to the veggie garden.

Starting a compost pile is as easy as following any recipe. Just the right materials are all mixed. In a matter of months, you’ll have finished black gold to mix into the soil of your flower, herb, and vegetable gardens. Or leave it in the garden beds where the biomass is laid. 

MAKING A PILE

To get started, find a place for your compost pile that’s convenient to the garden and has well-drained soil.

Here are seven simple steps for making compost:

  1. Add a Brown Layer—leaves, old grass clippings, shredded paper, hay, and straw for your carbon source. Think brown as in not moist. Lay a 4- to 6-inch-thick layer of brown material on the bottom. Shred the materials before adding them to quicken the decomposition process.

  2. Moisten Layer—Dampen the bottom layer so that it’s moist but not soggy. The moisture will help accelerate the decomposition process by providing the right environment for microbes to break down the material.

  3. Add a Green Layer—Fresh grass clippings, vegetable kitchen wastes, garden biomass such as weeds, small twigs, and herbaceous cuttings snipped into 6-inch pieces or less lengths; disease-free vegetable plants; and cow, horse, or chicken manure.

  4. Add a second Brown Layer.

  5. Moisten Again.

  6. Add a second Green Layer—2- to 4-inch-thick layers of nitrogen-rich green materials, such as fresh grass clippings or vegetable kitchen scraps. If you wish, add a compost enhancer or fertilizer to help jump-start the pile.

  7. Make More Layers—Alternate layers of brown and green material until the pile is 3- to 5-feet high (or container is full). Moisten each layer before adding the next.

Ok, so now you know the secret. You really can’t mess up. Just keep in mind to build the pile with roughly equal amounts of green and brown, and keep moist. Also, it's best not to include large sticks, so break them up into smaller pieces; the green materials should be small as well, to accelerate decomposition.

OUR TRANSPLANTS

While digging out the compost bin, we found three snowdrop bulbs, Galanthus elwesii. What a find indeed! Nell planted it in the driveway bed.

Then we found an American beech, Fagus grandifolia, volunteer to close to a path. We transplanted it into the Beech Copse area. After planting, Nell and I felt a motherly pride. We shall call her, Baby Beech!

Until soon,

Helen Yoest, Horticultural Specialist

No Brainer How-To Compost Garden Biomass

You may be familiar with composting kitchen waste. There is a lot written about it. But did know you do the same for garden biomass, formally known as yard waste? The practice is no different. 

Starting a compost pile is as easy as following any recipe. Just the right materials all mixed together. In a matter of months, you’ll have finished black gold to mix into the soil of your flower, herb, and vegetable gardens. Or just leave it in the garden beds where the biomass laid. 

In the Bee Better Teach Garden, we practice cold composting, which is basically composting in place. There is no turning. This practice takes longer for the biomass to become compost, but it really works well in our garden, because we can leave it and forget about it, it’s ready to use before we know it! 

We compost biomass in a discrete place, and I designed the garden to allow for this. The beds were designed with a formal boxwood hedge to add structure to all the wildness behind them. It doesn’t have to be in a discreet place but for many, keeping a tidy garden is necessary. I’m one of those people, so when I designed my garden I allowed for this. Since 1997, I have been doing this in beds behind the boxwood hedge, filling one and moving on to the next, and I truly have the best soil in six states!

Bee Better Naturally Cold Composting

Bee Better Naturally Cold Composting


COMPOST INGREDIENTS

Compost is decomposed or well-rotted organic material. It can be made from a variety of organic materials, such as vegetable waste, leaves, grass clippings, and even animal manures. The cleanup of our chicken coop also goes over these compost piles, the high nitrogen helps break the garden waste down faster. 

Making cold compost is a very simple process of alternating layers of brown (high in carbon) and green (high in nitrogen) ingredients–-adding water between each layer–-and keep topping off with a mixture of brown and green. I do so until I can see the top from behind the hedge. And given the hedge is at least 40-feet long and 15-feet deep, that is a lot of area to fill.


MATERIALS TO USE

Brown ingredients, such as old grass clippings, shredded paper, hay, and straw are the high carbon ingredients. We also #LeaveTheLeaves. I’m also been known to pick up bagged leaves from the street when I know the leaves are maple or oak. Great wildlife food source!

Green ingredients, such as fresh grass clippings, although I don’t bag my clippings; rather, I recycle them to the lawn as I cut, providing about 25% nitrogen required for turf; vegetable kitchen wastes (including coffee grounds; no, especially coffee grounds, which are high in nitrogen.); yard biomass such as weeds and small twigs; disease-free vegetable plants; and cow, horse, or chicken manure. Again, I take advantage of this when cleaning out the girl’s coop. If you are low on green materials, you also can use high-nitrogen organic fertilizers, such as blood meal and cottonseed meal.

Materials To Avoid

Items that should be kept out of compost include meat, bones, and dairy products. It’s not that these items won’t break down, they will if animals don’t get to them before the solider flies come in to reduce the mass in no time. Also, make sure the added material is cut up small. Large amounts of wood chips won’t break down quickly.


MAKING A PILE

To get started, find a place for your compost pile that’s convenient to the garden and has well-drained soil.

Here are seven simple steps for making compost:

  1. Add a Brown Layer—leaves, old grass clippings, shredded paper, hay, and straw for your carbon source. Think brown as in not moist. Lay a 4- to 6-inch-thick layer of brown material on the bottom. Shred the materials before adding them to quicken the decomposition process.


  2. Moisten Layer—Dampen the bottom layer so that it’s moist, but not soggy. The moisture will help accelerate the decomposition process by providing the right environment for microbes to break down the material.


  3. Add a Green Layer—Fresh grass clippings, vegetable kitchen wastes, garden biomass such as weeds, small twigs, and herbaceous cuttings snipped into 6-inch piece lengths or less; disease-free vegetable plants; and cow, horse, or chicken manure.


  4. Add a second Brown Layer


  5. Moisten Again


  6. Add a second Green Layer—2- to 4-inch-thick layers of nitrogen-rich green materials, such as fresh grass clippings or vegetable kitchen scraps. and If you wish, add a compost enhancer or fertilizer to help jump-start the pile.


  7. Repeat—Alternate layers of brown and green material until the pile is 3- to 5-feet high (or container is full). Moisten each layer before adding the next.

Ok, so now you know the secret. You really can’t mess up. Keep in mind to layer the pile roughly with equal amounts of green and brown, and keep moist. Also that there are no large sticks, and smaller ones are broken up into smaller pieces; as well as the green materials are small to accelerate decomposition. 


THE BREAKDOWN

You can turn the pile if you like doing that sort of thing. I don’t. If you do, wait until after the center heats up and then cools down (up to several weeks, depending on the time of year and size and composition of the material), turn the pile. Use a garden fork, composting tool, or shovel to mix the contents, blending the inside and outside materials. Moisten the pile again after mixing. Repeat turning the pile once or twice. The compost is ready to use when it’s dark and crumbly–usually in a month or two. With no turning, it will take twice as long, but I’m in no hurry.

Incorporate a 1- to 2-inch-thick layer of finished compost into vegetable and annual flower beds two weeks before planting. On poor soil, add a 2- to 3-inch-thick layer.

Now you are all set!!! When you begin spring cutbacks, you will have enough brown to start with, then with your first grass cutting, add your green. So yes, it doesn’t have to happen on the same day or even week.

Compost happens!

The Joslin Garden—Quandaries—Poles, a Hole, and Hellebore Hell!—2-18-21

One of the best ways to view your garden is through pictures. What you’ll find is that you have walked by an untidy hose, a broken board, leaves covering a bench, or any number of things you don’t see because your mind is so used to seeing these objects, and they disappear. 

This week we are addressing three such quandaries: The Poles, The Hole, and the Hellebores!  Another one, untidy hoses, has already been addressed. I will be the first to admit, I’m a stickler for this kind of details. 

THE POLES

The Poles

The Poles

While I was working on The Porch Bed last time, I took before and after pictures. And even though I was in this bed working for several hours, and probably even tripping over the poles, I didn’t see them until I studied the photographs. Crazy, right?  I’m typically very observant. Actually, I saw one individually, and maybe them all individually, but the after pictures revealed several of them.

Seeing the poles begged the question, “Why are they there?” Fortunately, we have Nell Joslin to help demystify quandaries. Or do we? When I asked Nell what there were once used for, she didn’t know. That proves my point. For a lifetime, Nell walked by these poles and never knew why they were there. 

The poles look like old survey stakes. I remember cutting my foot on of these as a seven-year kid playing in the front yard. We lived on a corner lot, and of course, BACK THEN, we never wore shoes. (My mom was on to something every time she yelled to us, “Keep your shoes on!”) But of course, we kids didn’t listen at that age, especially when it came to what might hamper outdoor play activities. No one wore shoes…then. Going barefoot was worth the risk of a few stitches. Ha!

I wondered if they were once bird feeder posts, but upon closer inspection, they were several in a row, which let me believe this, but then I noticed on one side, the poles made a right angle. Not likely for the bird feeders.

On further thought, Nell Joslin weighed in, here are her thoughts: “About the stakes, I think that bird feeders are actually a very possible explanation. I remember my father having bird feeders in that vicinity. Also given the years and years that the land has been farmed and now gardened, there are all kinds of possibilities -- surveyors' stakes, remains of old fencing from the days when livestock was kept on this land, or even horseshoe pits. There is also evidence that Civil War troops occupied these lands in the 1860s (shell casings have been found). And lots and lots of Indian arrowheads from 100s and 100s of years ago (way older than those pipes, of course!). I do wish I'd thought to ask my father when I had the chance.”

THE HOLE

A Hole

A Hole

This hole has all of us scratching our heads! The hole wasn’t even known about until a kid was playing in The Joslin Garden, and one foot fell into the hole! The hole was off the beaten path, and not likely found until this happened. While we encourage visitors to the garden, Monday through Friday, from 9 to 5, we have signs posted to stay on the paths. Much like my story above, not listening, these kids strayed. Here is our quandary. What purpose did the hole once serve? Nell didn’t know. The hole is three-foot deep and just as wide once you enter the hole. The entrance hole is only about 18-inches wide. Both the entrance hold and the beneath ground void are perfectly symmetrical. 

My large gardening glove for perspective.

My large gardening glove for perspective.

Maybe once, long ago, It could have been a tree or shrub, most likely a ball and burlap, that has completely disappeared. It could be a nest, but there were no signs of that at all. Nell doesn’t remember it as a child. It’s a quandary, one we may never know the answer to unless we can Google an old aerial map. I’m looking into this.

Inside the hole

Inside the hole

HELLEBORE HELL!

Um, “stinking” hellebores

Um, “stinking” hellebores

Maybe we have gotten a little obsessed with our stinking hellebores, Hellebore foetidus. It keeps showing up in our posts. We hope to soon tame them to the point where they can easily be controlled. Stinking hellebores are great plants and early nectar and pollen sources for early emerging bees. But we have too much of a good thing in The Joslin Garden

We’ve put out an offer to Raleigh City Parks for District gardens which might want to add these hellebores to the gardens under their care.. District 5 will be using many in the Valley Henderson Park, and we even offered these to District gardeners to stop by and dig up all they need. That’s how nice we are; she writes tongue-in-cheek!

Do you like irony? We may be going too far on this irony, though. Did you know Mary Coker Joslin didn’t like the word “stink,” and it wasn’t allowed to be spoken at home? Interesting, right? 

Nell doesn’t know when the stinking hellebores first showed up in the home garden, but we do know stinking hellebores were not liked by Mrs. Joslin at all. Nell wondered if her Mom knew the common name and that was why she didn’t like this plant. In any case, The Joslin Garden is now overrun with not only a plant Mary Joslin didn’t like but had a common name she wouldn’t allow said at home. Thus, we will rectify this quandary by getting rid of as many as possible, and everyone never uses THAT common name again. What will they be called? How about the other common name, “bearclaw”?

Up next week, we will continue to tackle the bearclaw hellebores, direct sowing red and salmon-colored poppies collected last summer from the Bee Better Naturally Teaching Garden and emptying the compost pile for a fresh start.

Until soon,

Helen Yoest

Horticultural Specialist

The Joslin Garden—The Mondo Mess, The Hot Mess, and a Distressful Mess—2-11-21


Over time, every garden needs some taming. Many designers will suggest a complete redo of an original design every five years or so. Today we tackled three messes of overgrown, beyond boundaries, situations.

The Mondo Mess—Climbing Hydrangea

Oh dear, what to do?!? We have a confused and overgrown mondo mess!

I've grown climbing hydrangeas, Decumaria spp. before, and although there are similarities to hydrangeas, despite its common name, this isn't a hydrangea at all! 

Decumaria barbara or sinensis..jpg

I asked my friend, Tim Alderton, at the JC Raulston Arboretum, if he knew which climbing hydrangea this was, a Decumaria barbara or D. sinensis? He replied that he couldn't tell from the picture, but in either case, it was probably given to the Joslins by the JCRA.

Climbing hydrangea in flower.

Climbing hydrangea in flower.

Climbing hydrangea is a woody vine to 30 ft., attaching by rootlets. The leaves are smooth, shiny, round to oval, deciduous, and the flowers are fragrant. This vine can be used as both a trailing groundcover and a climber; it will only bloom when climbing and then only on new wood.

Climbing hydrangea back side.jpg

My first approach was to thin out this mondo mess before transplanting and save those clippings. With these aerial roots, we can propagate, then grow them out and offer to do a fundraiser. Stay tuned!

Revived climbing hydrangea Decumaria barbara or D. sinensis?jpg.jpg

It took some doing to untangle. At first, Nell and I thought the main root was planted above the wall. As I worked my way through, the original design became clear. We hope we see new sprouts in spring and we can then train them along the wall. My educated guess was that it was planted and then forgotten about. It’s on our radar now!


Hot Mess—Porch Bed

Next up was trying to tame the hot mess in the Porch Bed. What a mess. A HOT mess, actually.

The Windmill Palm/Porch Bed before

The Windmill Palm/Porch Bed before

These are the kind of projects I like to do. I know they are overwhelming to many as to where to begin, but like any journey, it starts with there first step.

It took a good part of the morning to clear out this bed of unwanted growth and invasives. We managed though. Now, all we need is mulch!

Tony Avent with Plant Delights Nursery called me the garden editor—a play on words because I like to edit gardens and because I’m a garden writer. I took it as a honor!!

The Windmill Palm/Porch Bed after

The Windmill Palm/Porch Bed after

Distress Mess—Stinking Hellebores

Stinking hellebores.jpg

They are EVERYWHERE. At first, when Nell pointed them out, I didn't quite understand. I know stinking hellebores, Hellebore Foetidus faster than a dog chasing a bunny, even though the bunny typically wins! In the case of stinking hellebore's, if you think, “Oh, they’re fine” before you know it, the chase is on! By the way, Mary Joslin wasn't a fan of them either, as we learned HERE!

Such began our journey to pull them out. At least they’re easy to pull and we want this done before they go to seed. On my!

We also picked up 10,000 fallen sticks, planted our Echinacea spp. ‘Cheyenne Spirit’, shared with us from the City of Raleigh greenhouse, and took down a Chinese holly.

Nell and I are making so much progress! Just think what we could do with three or four days a week!!!

Until Soon, Helen Yoest

Horticultural Specialist